

Using the PlanetScale serverless driver with AWS Lambda functions
Overview#
We recently released the PlanetScale serverless driver for JavaScript to allow developers to connect to their databases over HTTP, as opposed to TCP, which is blocked by some cloud providers. This guide will walk you through the most common use cases of the driver while building a serverless API on AWS using a Lambda function and API Gateway.
To follow along, you’ll need:
- A PlanetScale account.
- An AWS account.
- NodeJS installed.
- VS Code and the VS Code Rest Client plugin installed.
Please note that building on top of AWS costs real money. Some of the costs may be covered on the AWS free tier.
Set up the database on PlanetScale#
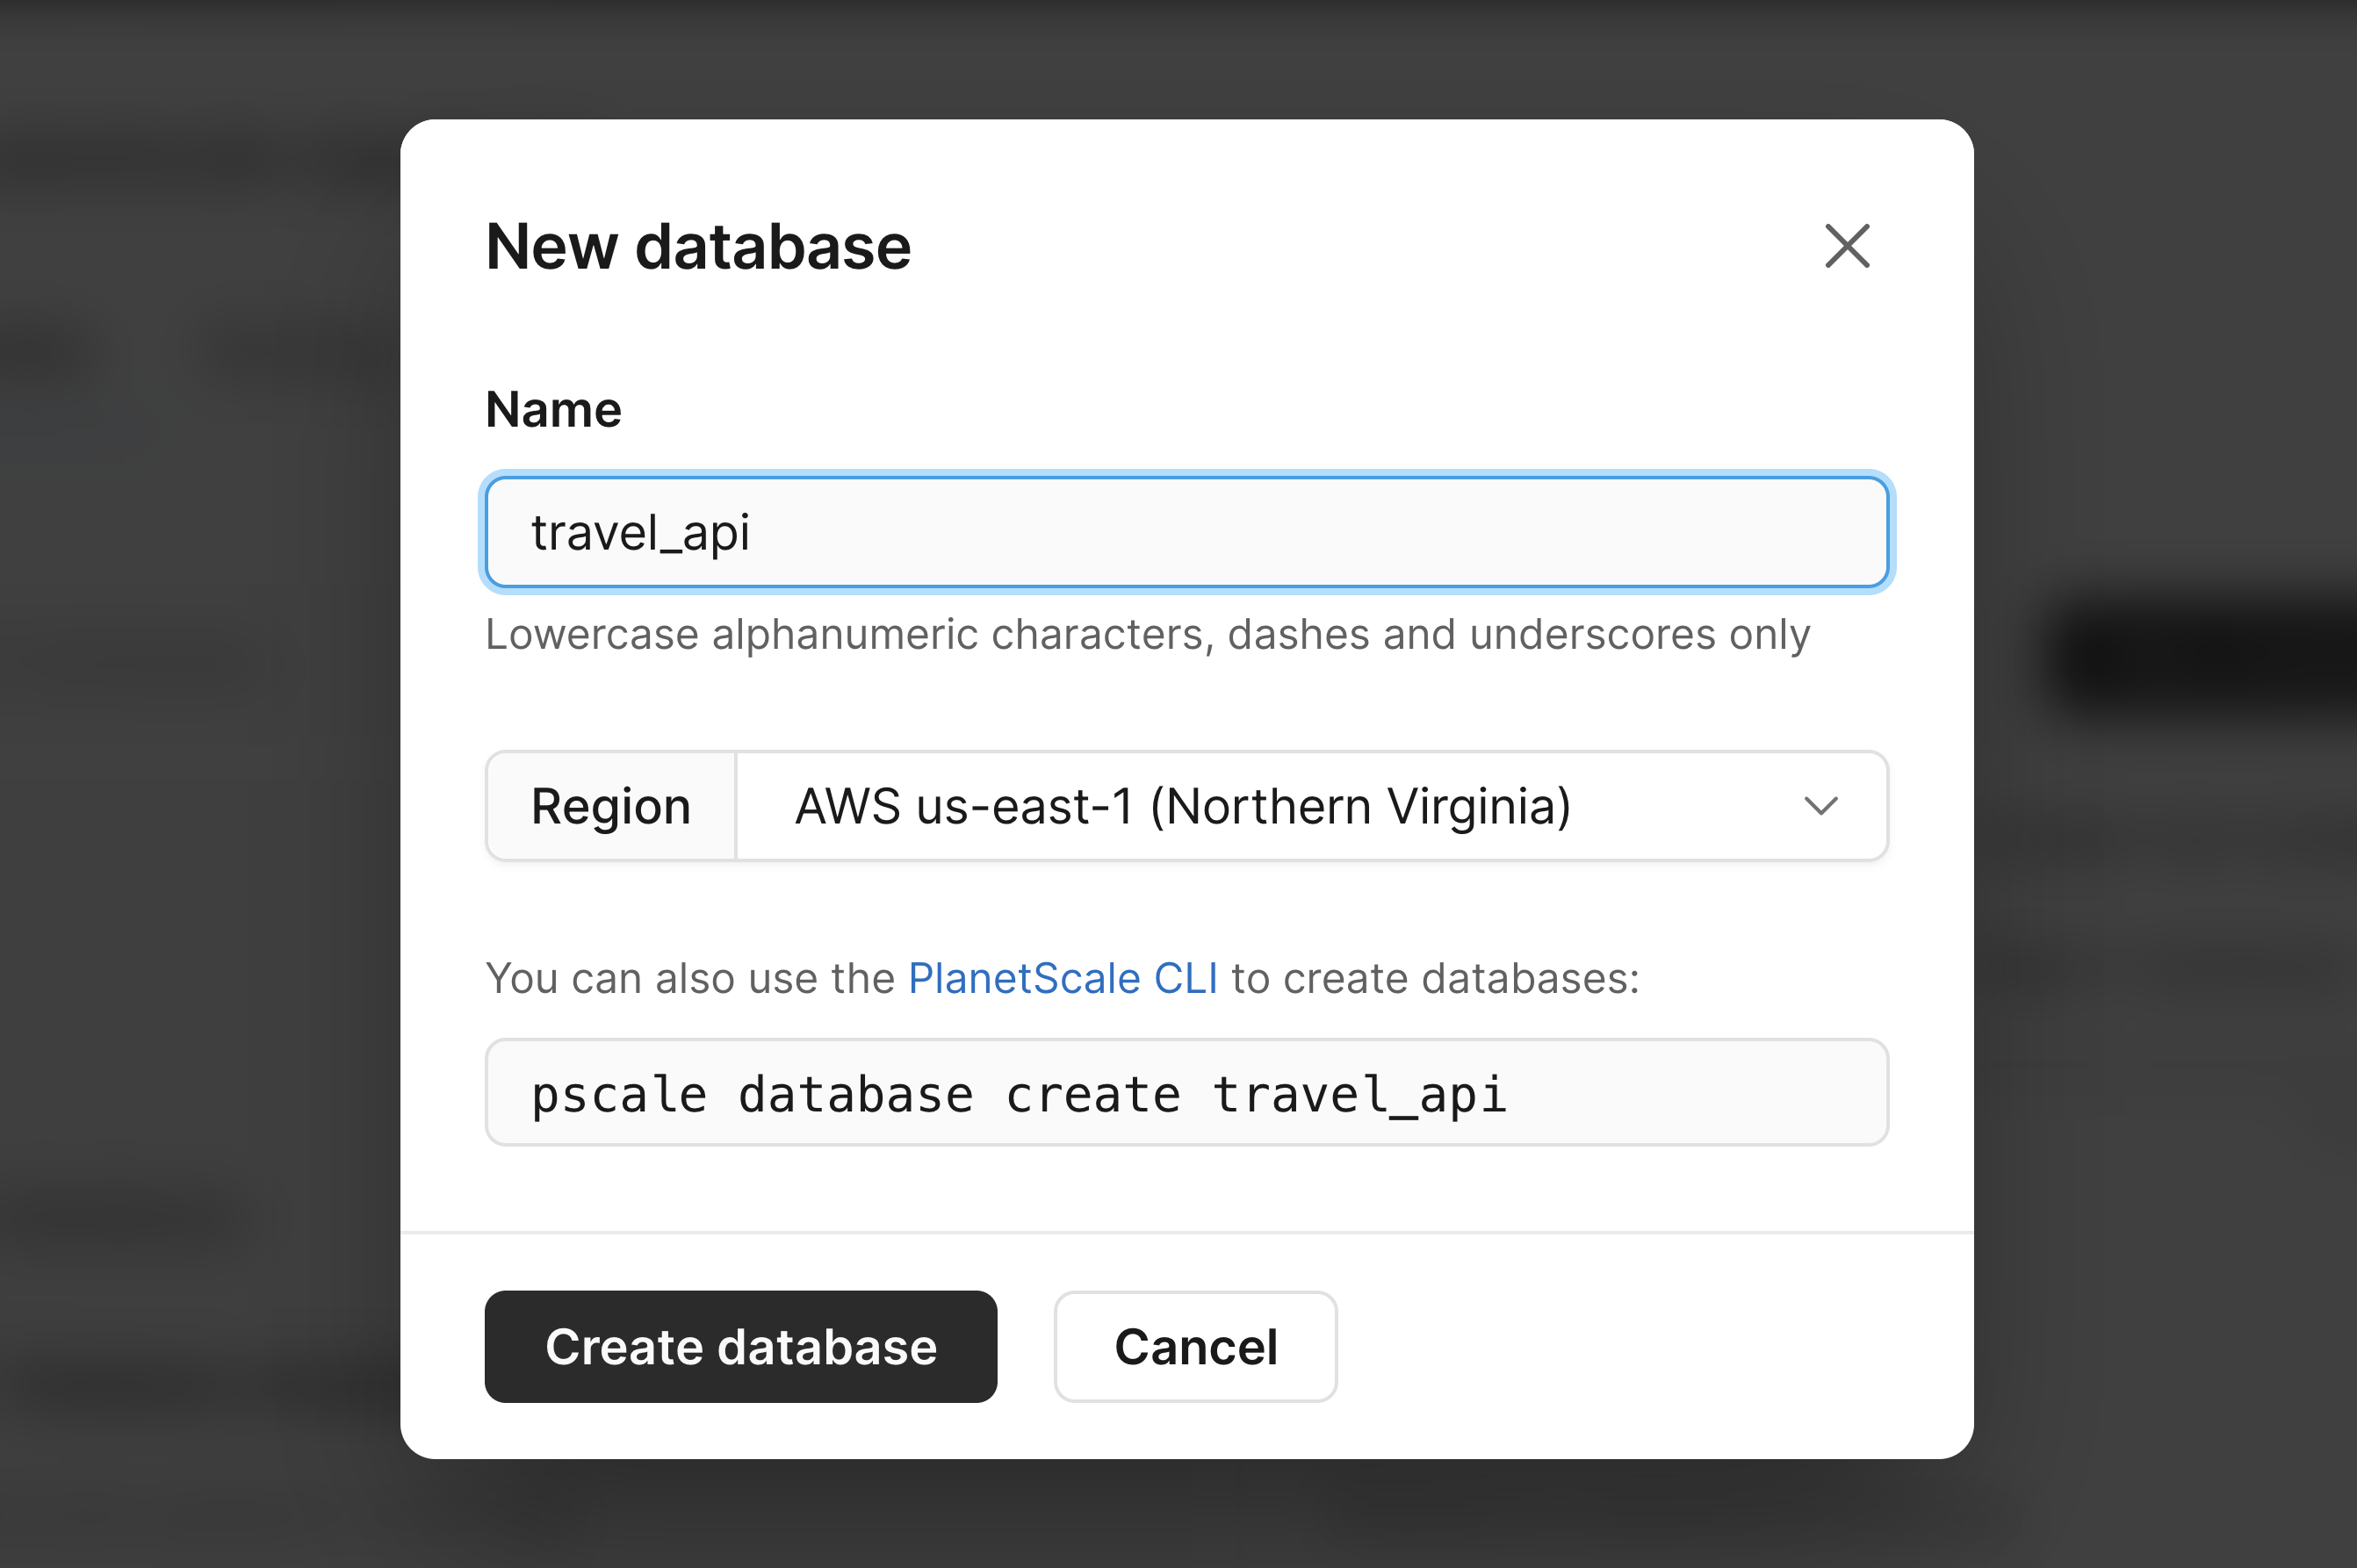
Start in PlanetScale by creating a new database. I’ll name mine travel_api.
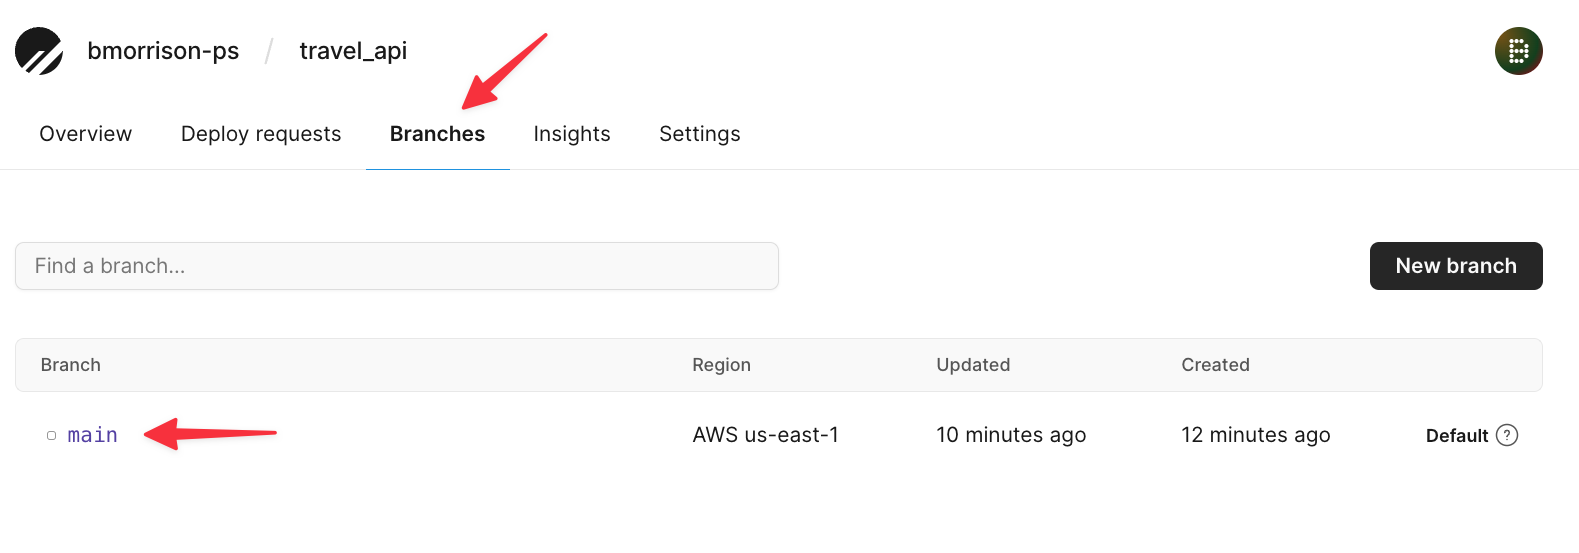
Now let’s add some data. Click on "Branches" > "main" to access the main branch.
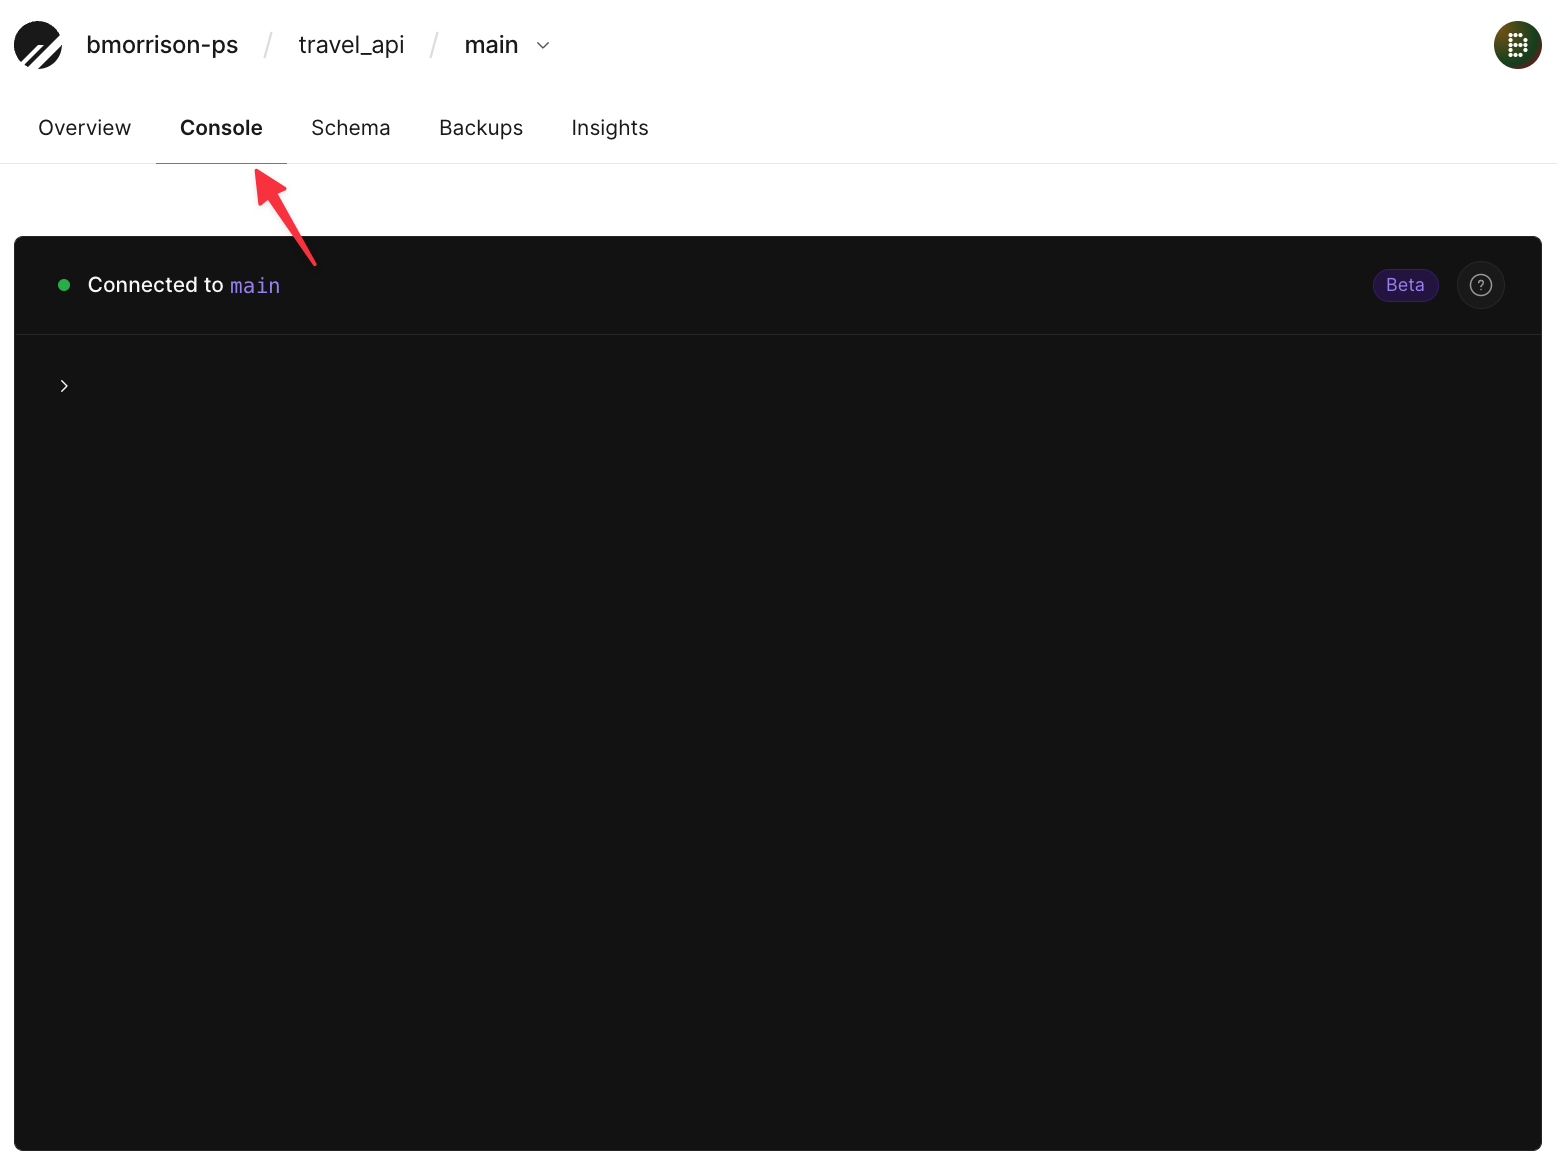
Now click on "Console" to access the web console of the main branch.
Run the following two SQL snippets to create a table and add a few records to it.
CREATE TABLE hotels(
  id INT UNSIGNED PRIMARY KEY AUTO_INCREMENT,
  name VARCHAR(50) NOT NULL,
  address VARCHAR(50) NOT NULL,
  stars FLOAT(2) UNSIGNED
);
INSERT INTO hotels (name, address, stars) VALUES
  ('Hotel California', '1967 Can Never Leave Ln, San Francisco CA, 94016', 7.6),
  ('The Galt House', '140 N Fourth St, Louisville, KY 40202', 8.0);
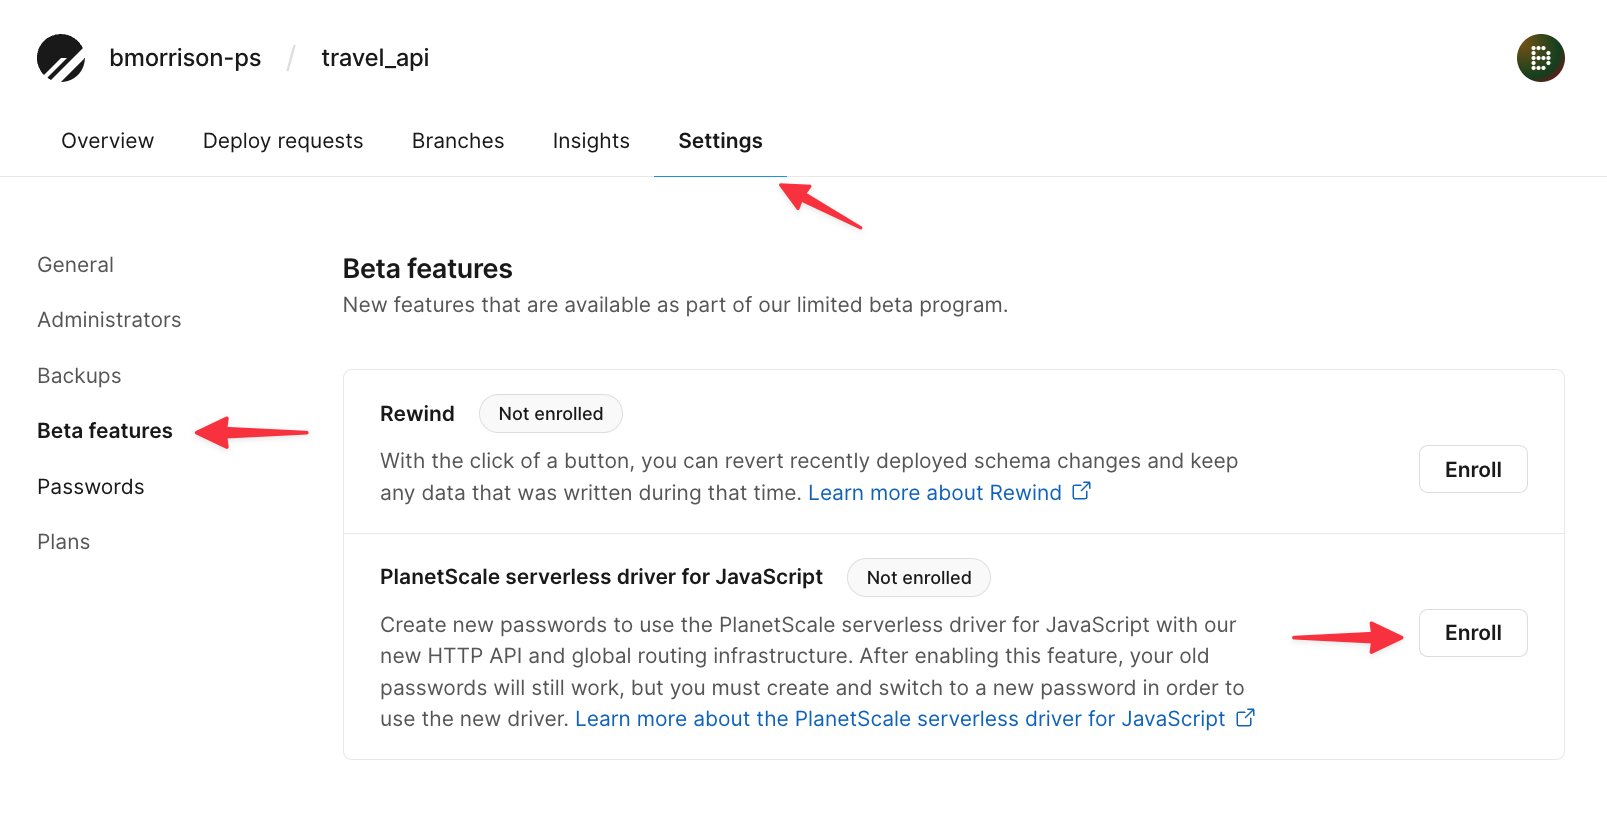
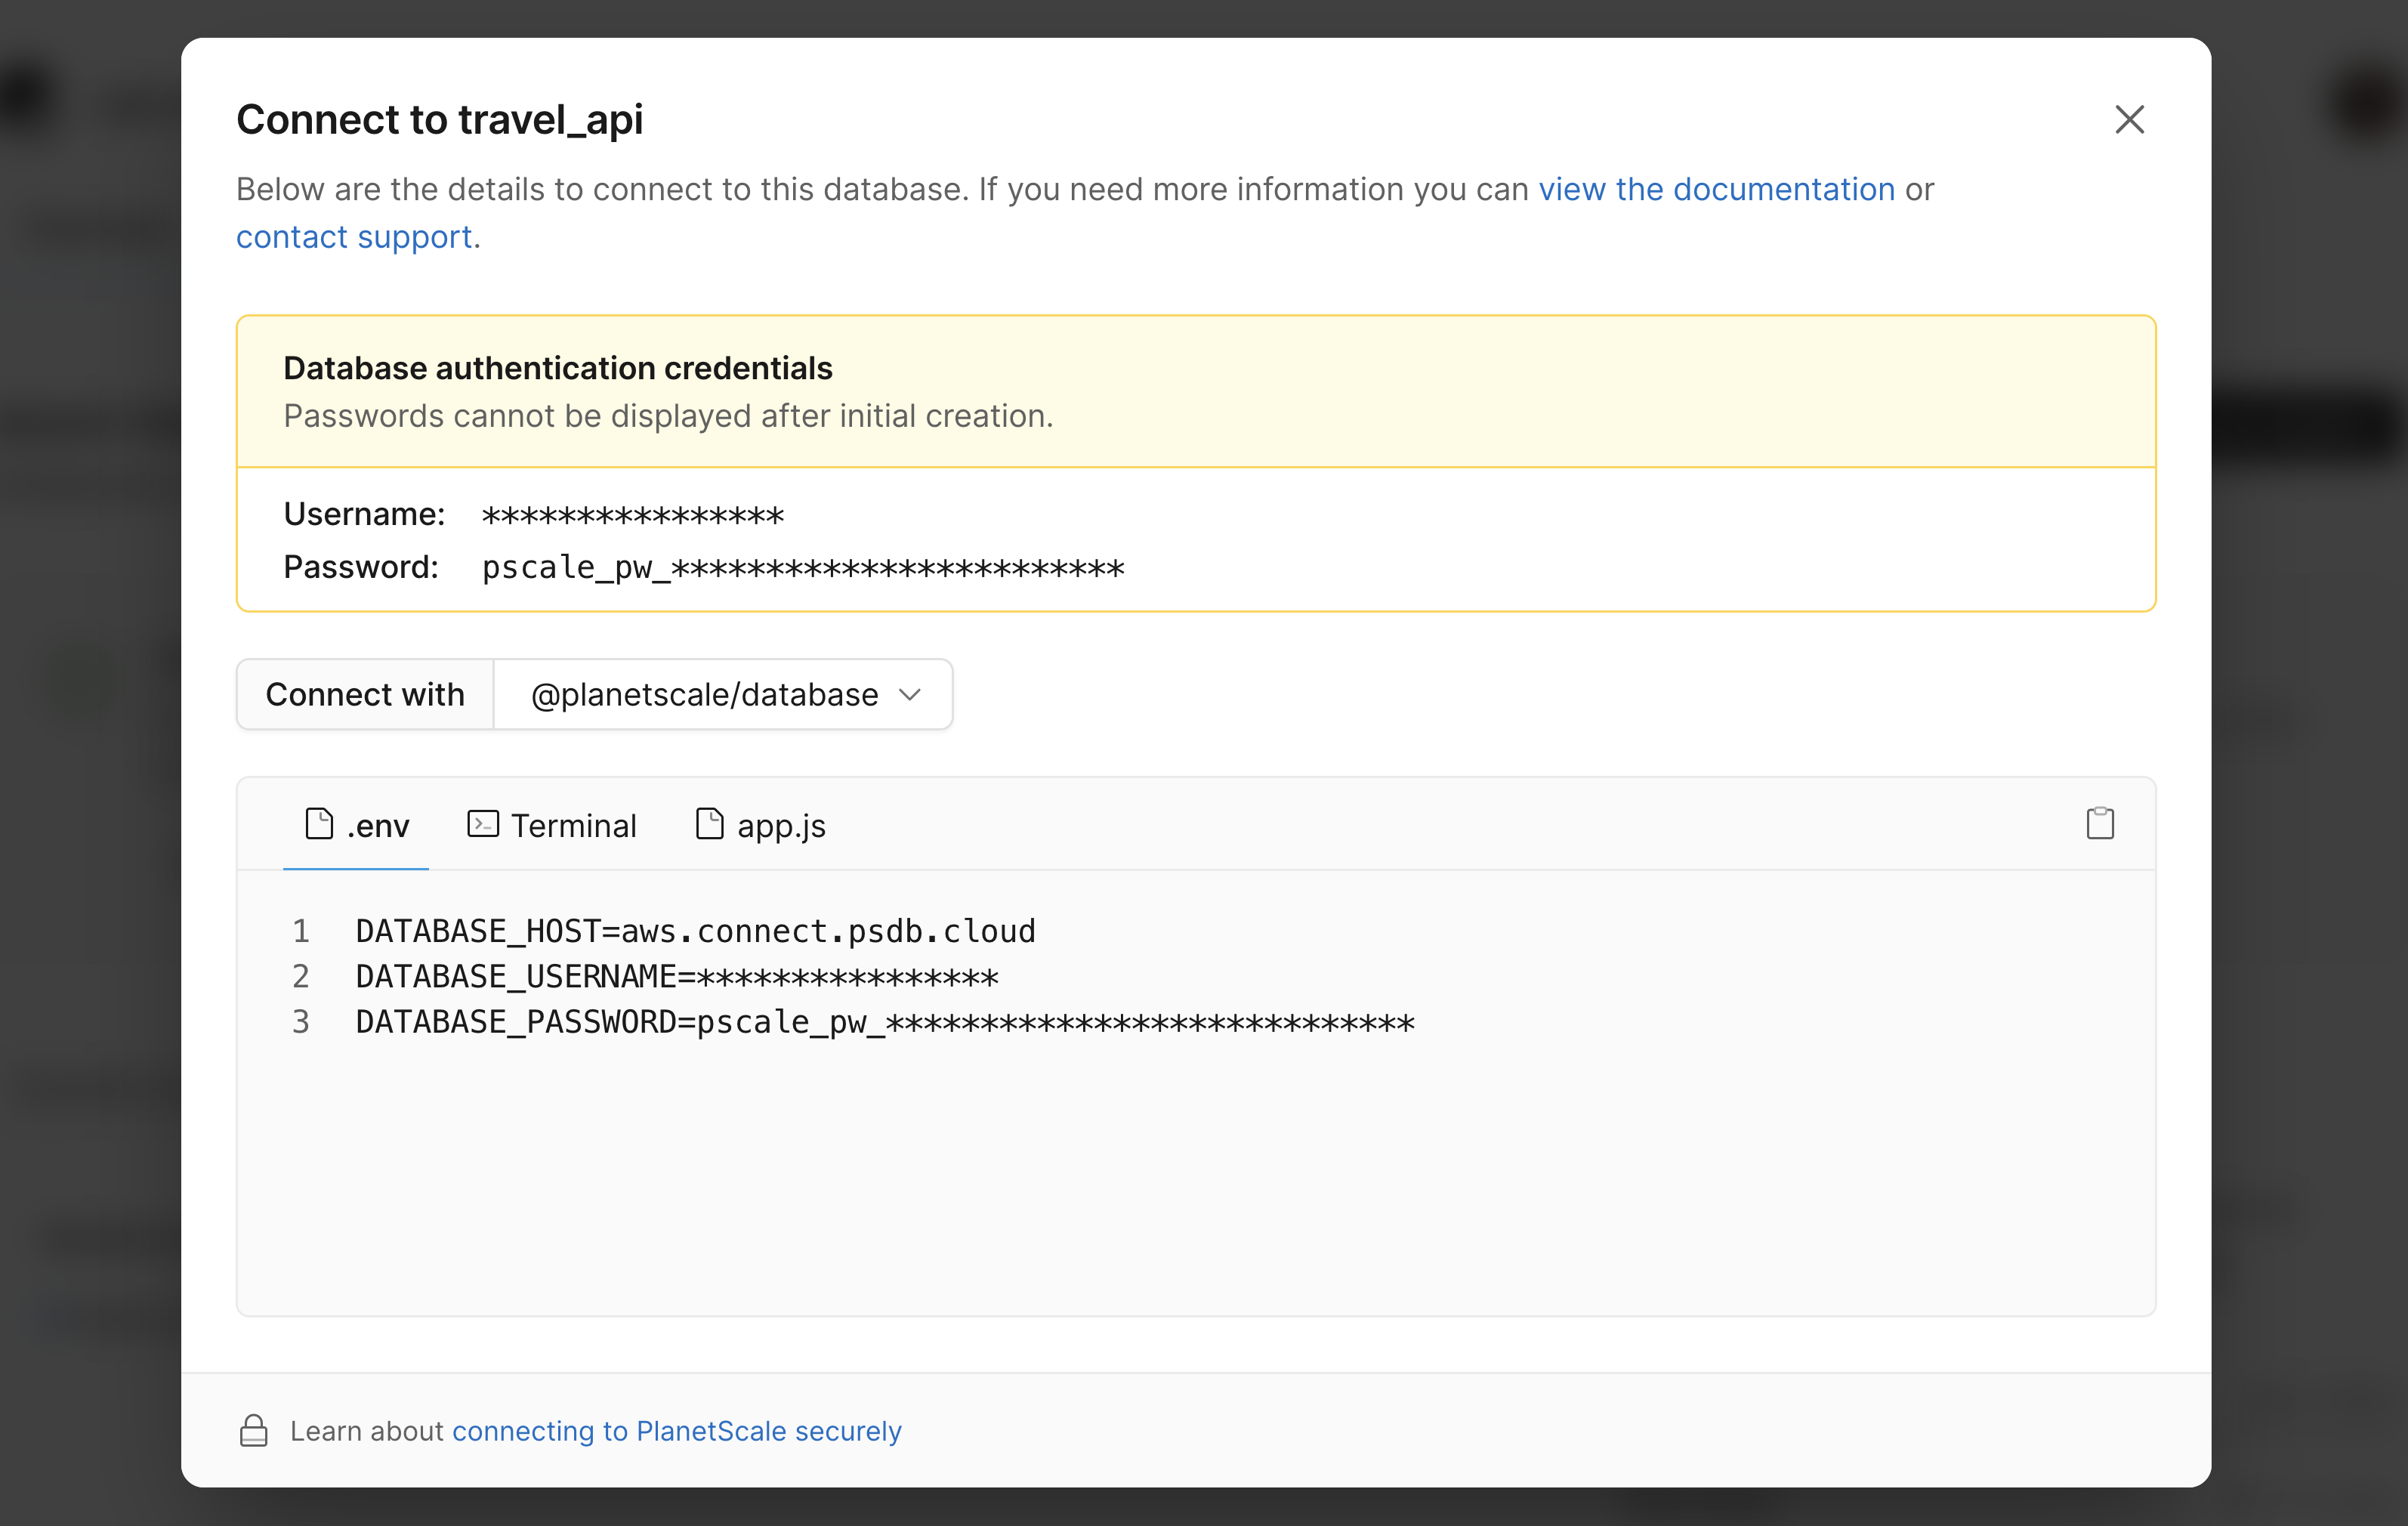
The serverless driver is currently in beta and needs to be enabled on the database level. To do this, click on the "Settings" tab > "Beta features", and click "Enroll" next to the PlanetScale serverless driver for JavaScript line. By enabling this feature, every new password created will have a different hostname, specifically to endpoints that support accessing your database over HTTP.
Now head back to the "Overview" tab and click "Connect".

From the Connect modal, select "@planetscale/database" from the dropdown. Note the text in the .env tab as we’ll need to configure these as environment variables in AWS.
Set up the Lambda function#
Start by creating an empty folder on your computer and opening VS Code. Open the integrated terminal and run the following command to initialize the project & install the necessary packages:
npm init -y
npm install @planetscale/database node-fetch
Open the package.json file and add a new entry to the file named “type” and give it a value of “module”.
{
  "name": "serverless-driver-aws-demo",
  "version": "1.0.0",
  "description": "",
  "main": "index.js",
  "type": "module", # ◀️ add type here
  "scripts": {
    "test": "echo \"Error: no test specified\" && exit 1"
  },
  "keywords": [],
  "author": "",
  "license": "ISC",
  "dependencies": {
    "@planetscale/database": "^1.3.0",
    "node-fetch": "^3.2.10"
  }
}
Create a file called index.js and add the following code to it.
import { Client } from '@planetscale/database'
import fetch from 'node-fetch'

const db = new Client({
  fetch,
  host: process.env.DATABASE_HOST,
  username: process.env.DATABASE_USERNAME,
  password: process.env.DATABASE_PASSWORD
})

export async function handler(event) {
  const conn = db.connection()
  const results = await conn.execute('SELECT * FROM hotels')
  console.log(results)
}
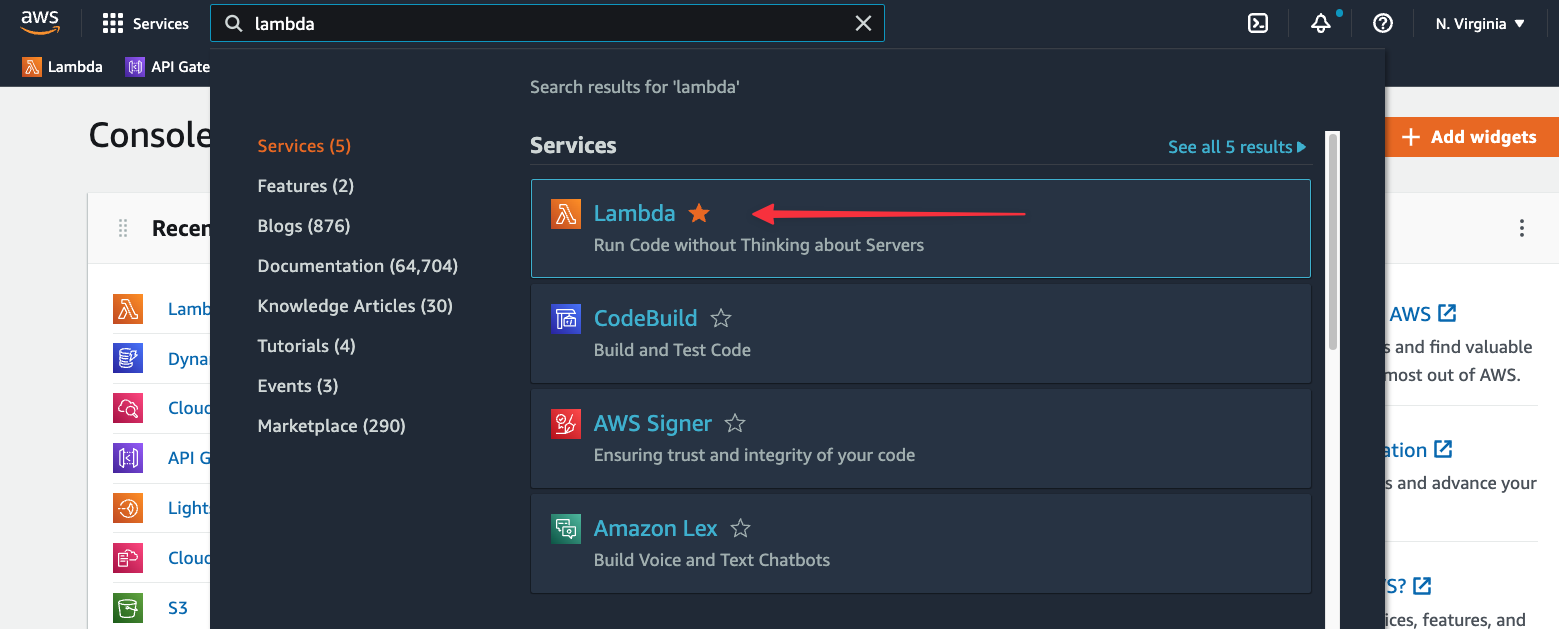
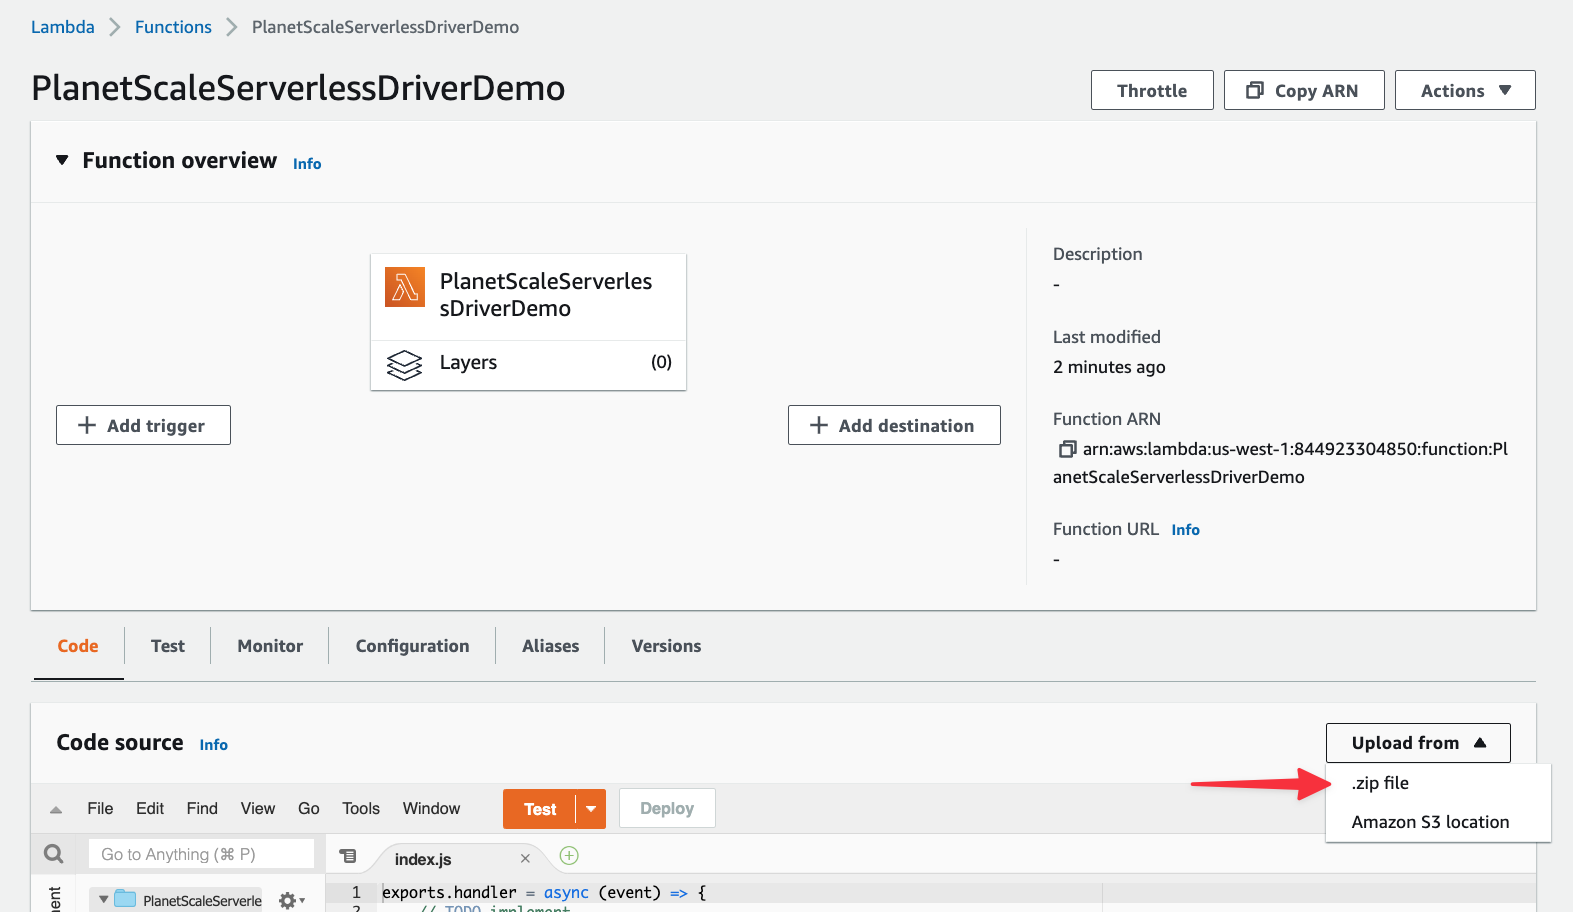
Now we need to get the code into an AWS Lambda function. Log into the AWS console, search for “Lambda”, and select it from the list.
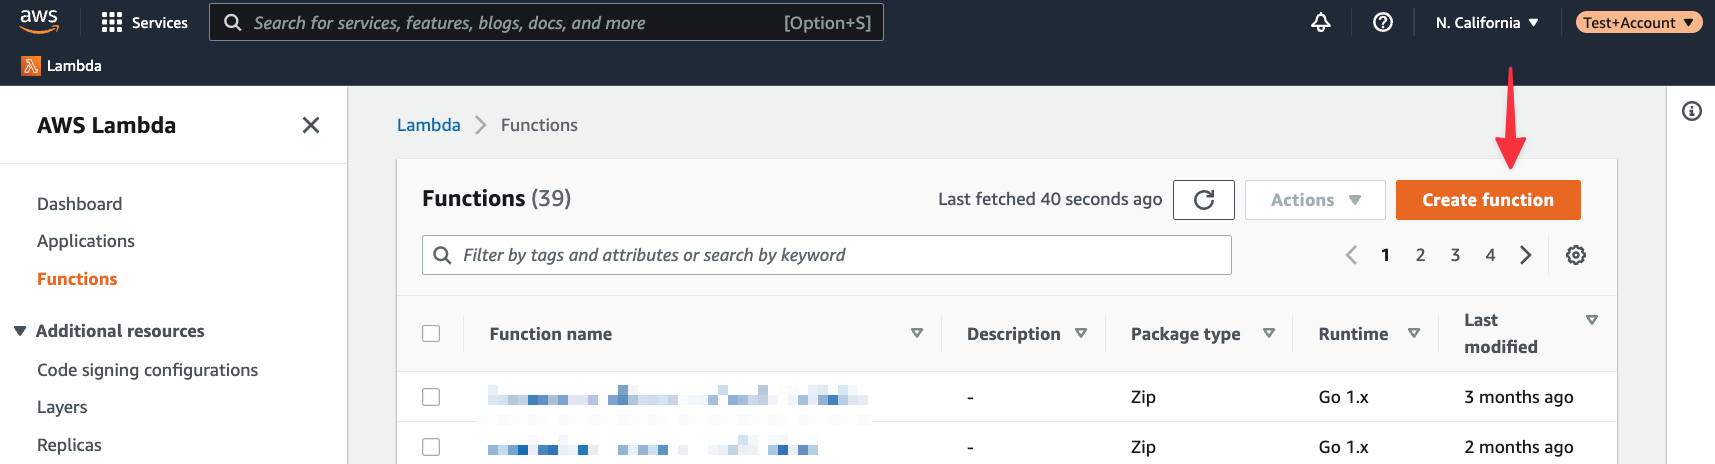
Click "Create function".
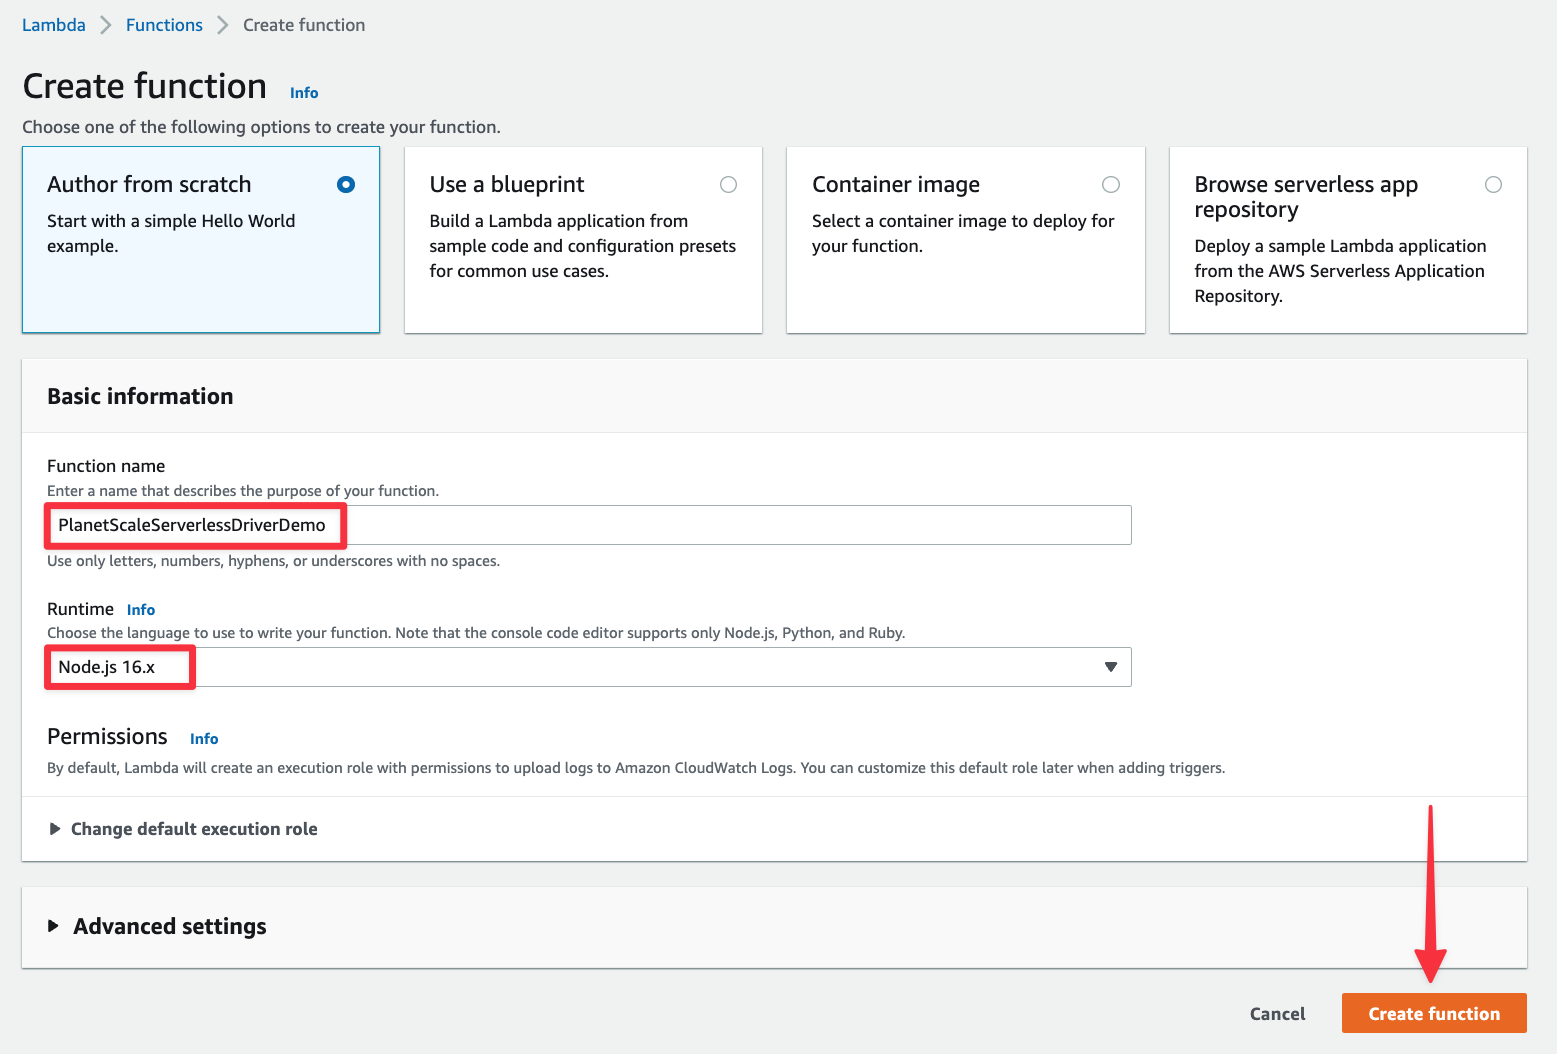
Give the function a name and make sure "Node.js 16.x" is selected under Runtime.
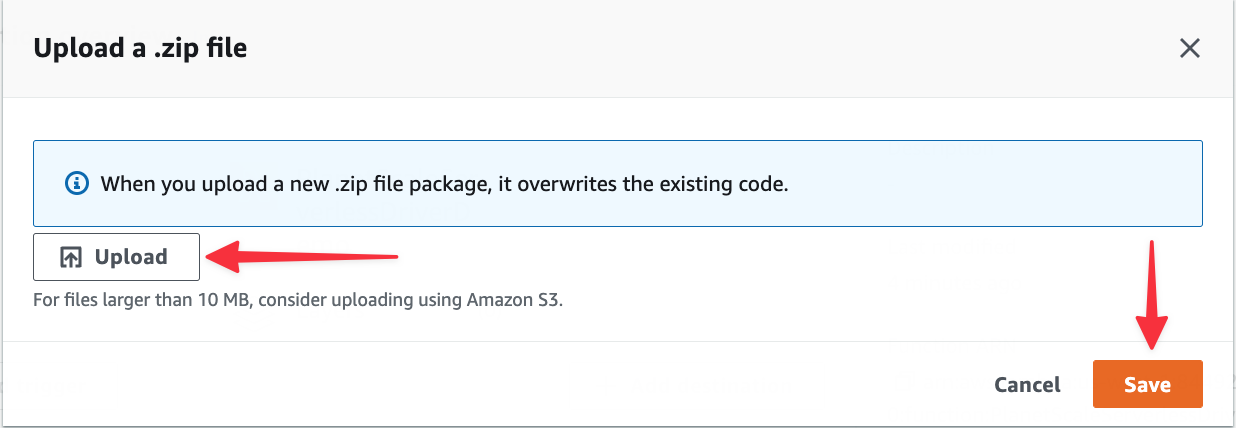
Once the function has been created, we need to upload a zipped version of the code we wrote. Zip up the contents of the folder, then in AWS, select "Upload from" > ".zip file".
Click the "Upload" button from the modal, select the zipped folder you created, and click "Save".
Next, select "Configuration" > "Environment variables", and click "Edit" in the main section of the window to add environment variables.
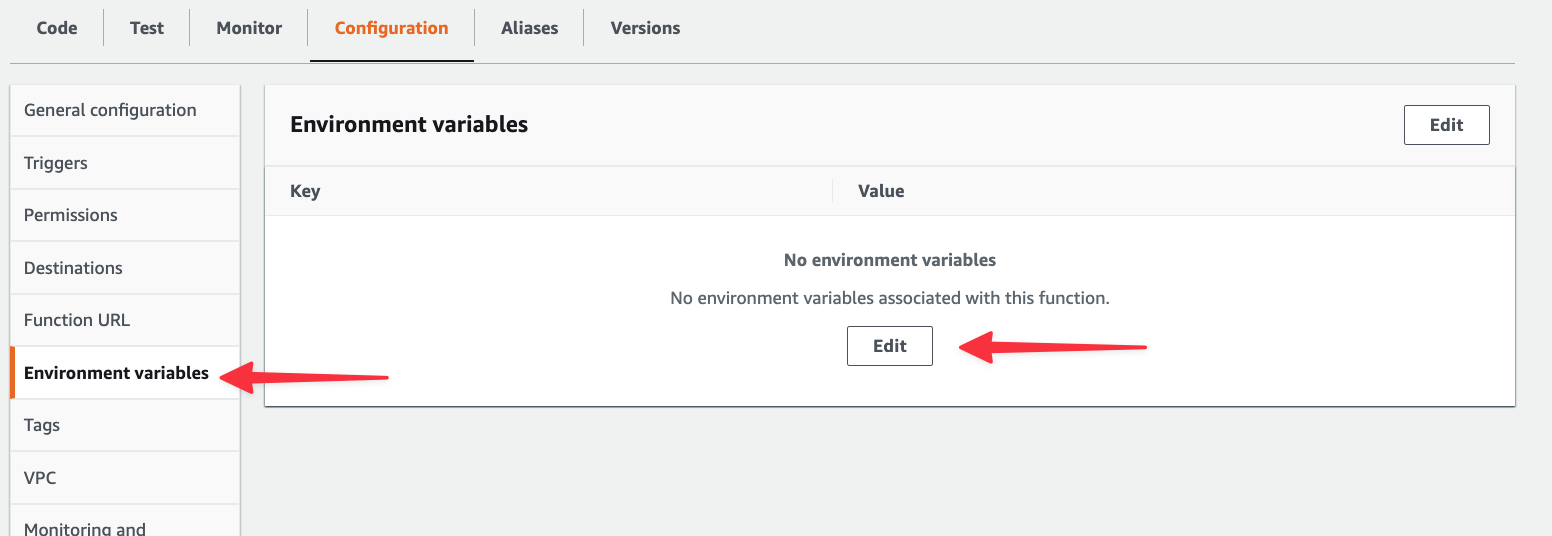
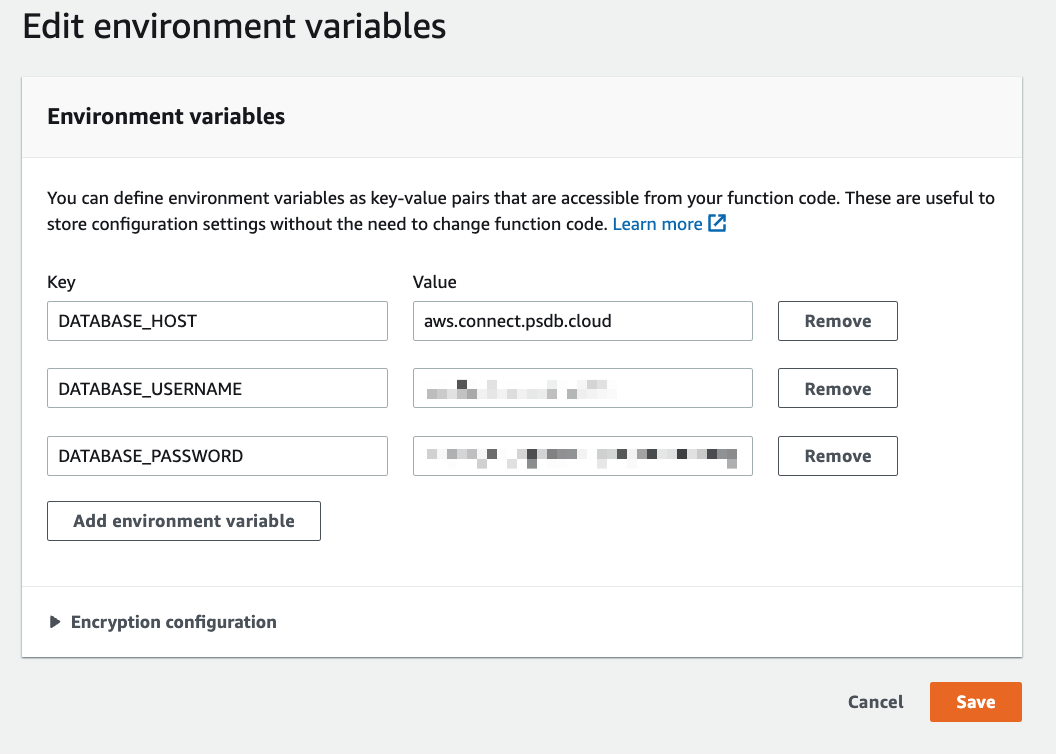
Click "Add environment variable" three times to get three entries and populate the fields using the environment variables gathered from the Connect modal in PlanetScale. Click "Save" once you’ve added them.
Now head back to the "Code" tab and click "Test".

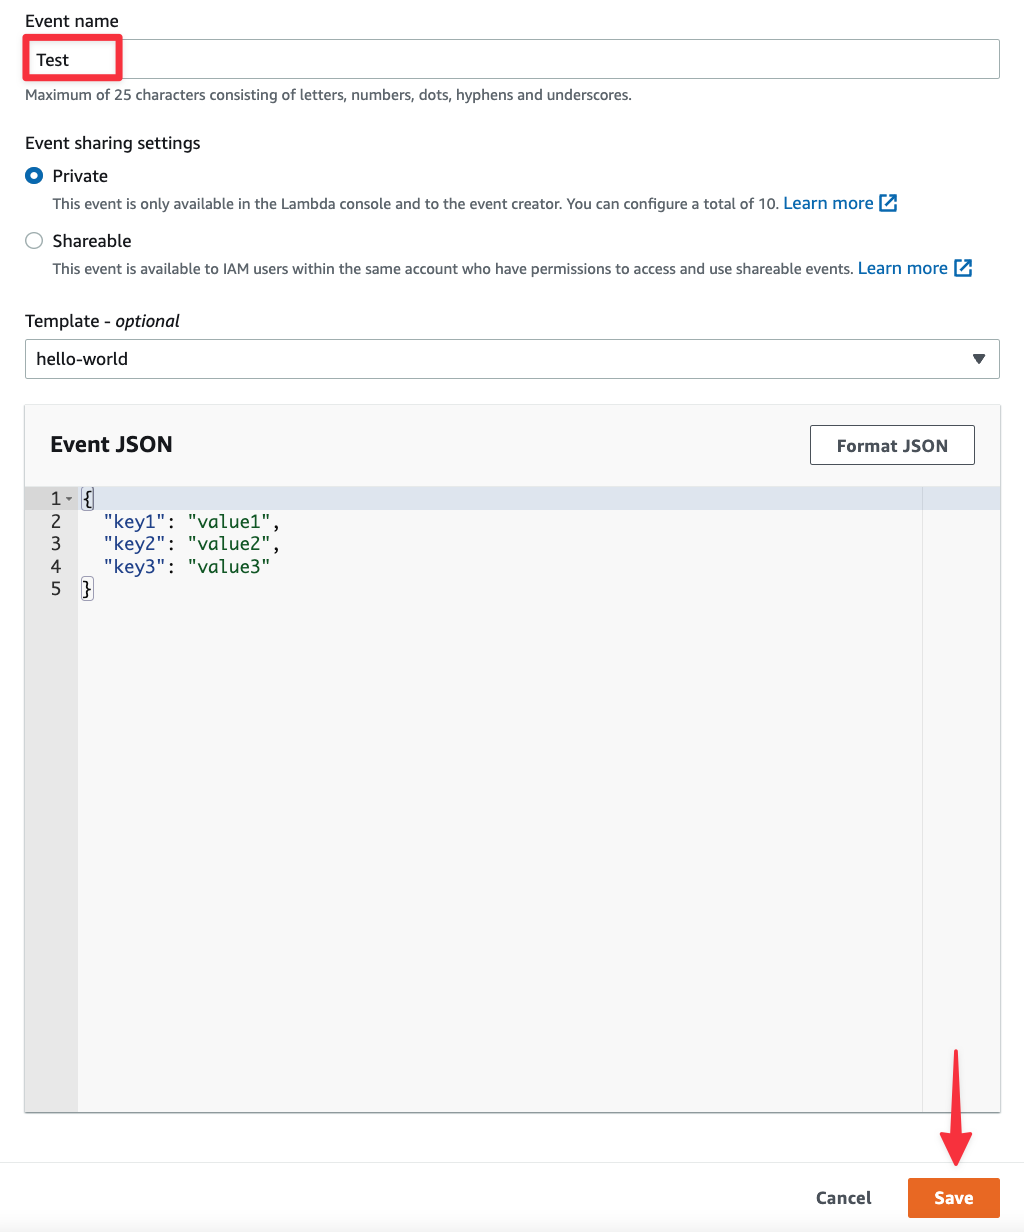
A modal will appear called Configure test event. Populate the "Event name" field with any arbitrary string (I’ll use “Test”), scroll to the bottom, and click "Save".
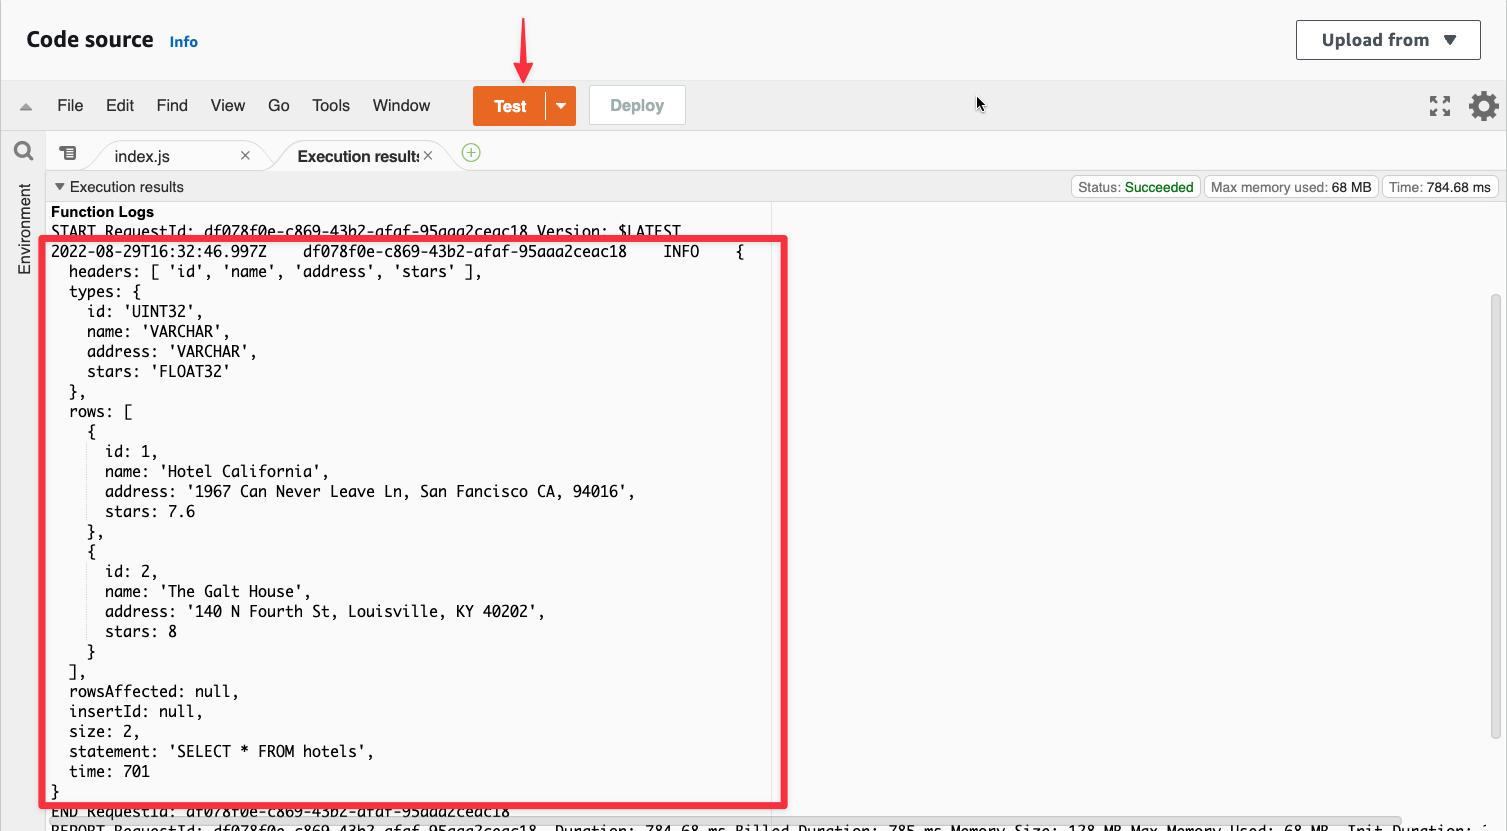
Now click "Test" again and it will run the function. You should see the output of the results object in a tab of the editor.
Build an API with API Gateway#
Now that you’ve seen how to use the serverless driver for JavaScript in the code, let’s explore the other common query types by re-building the function to support API Gateway, and mapping some of the HTTP methods to those queries like so:
| HTTP Method Name | Query Type |
|---|---|
| get | SELECT |
| post | INSERT |
| put | UPDATE |
| delete | DELETE |
In the following code sample, we’ve pulled out the logic to run the SELECT statement from the previous section into the get() function. We’re also using a switch statement on event.requestContext.http.method to map the request to a different function depending on that HTTP method. Finally, we also added a method to handle a post request so we can add data to the database.
Update index.js to match the following code, zip up the contents once again, and upload them into Lambda using the process defined earlier:
import { Client } from '@planetscale/database'
import fetch from 'node-fetch'

const db = new Client({
  fetch,
  host: process.env.DATABASE_HOST,
  username: process.env.DATABASE_USERNAME,
  password: process.env.DATABASE_PASSWORD
})

export async function handler(event) {
  const conn = db.connection()

  switch (event.requestContext.http.method) {
    case 'GET':
      return await get(conn, event)
    case 'POST':
      return await post(conn, event)
    default:
      return {
        statusCode: 404
      }
  }
}
async function get(conn, event) {
  const results = await conn.execute('SELECT * FROM hotels')

  return {
    statusCode: 200,
    headers: {
      'Content-Type': 'application/json'
    },
    body: JSON.stringify(results.rows)
  }
}

async function post(conn, event) {
  const { name, address, stars } = JSON.parse(event.body)

  const res = await conn.execute('INSERT INTO hotels (name, address, stars) VALUES (:name, :address, :stars)', {
    name,
    address,
    stars
  })

  if (res.error) {
    return {
      statusCode: 500,
      headers: {
        'Content-Type': 'application/javascript'
      },
      body: JSON.stringify(res.error)
    }
  }

  return {
    statusCode: 200,
    headers: {
      'Content-Type': 'application/javascript'
    },
    body: JSON.stringify({
      id: Number(res.insertId)
    })
  }
}
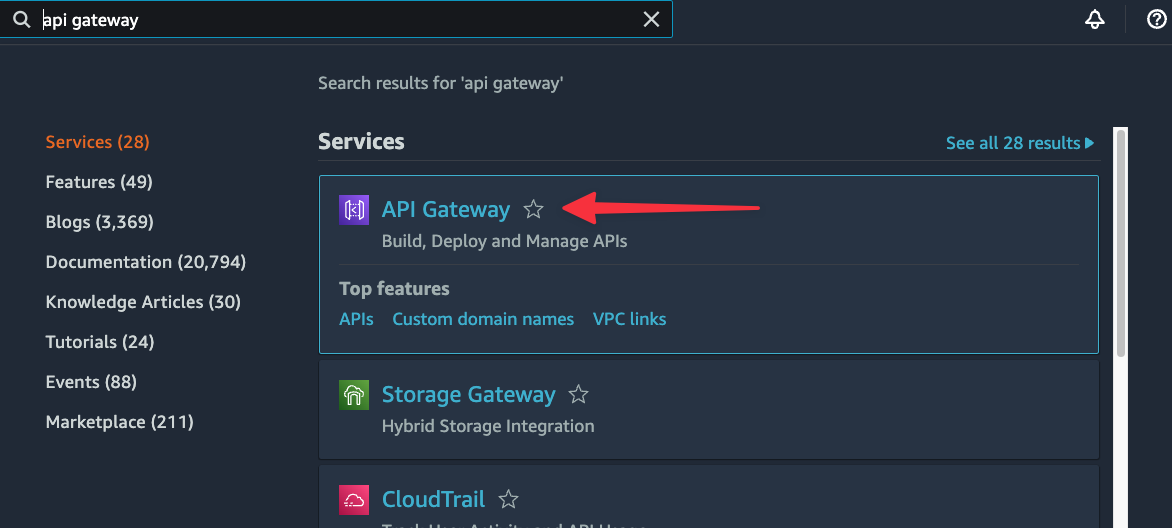
Now head into the AWS console and find “API Gateway” using the global search.
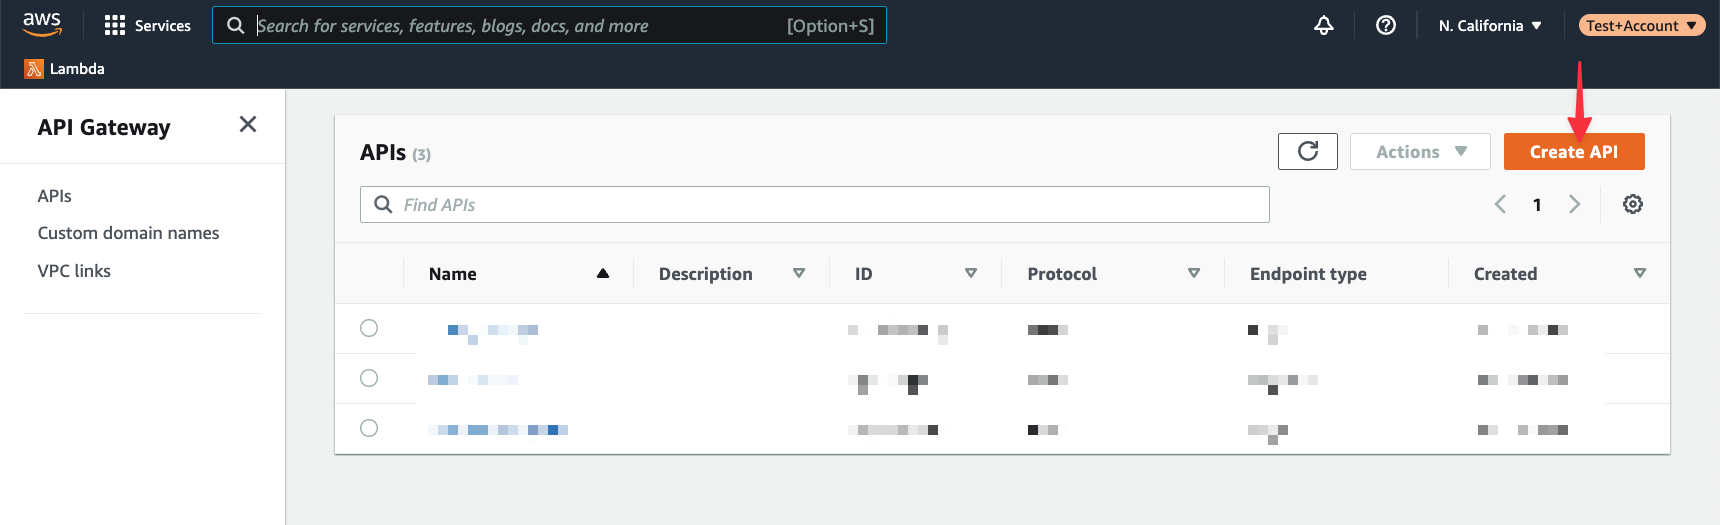
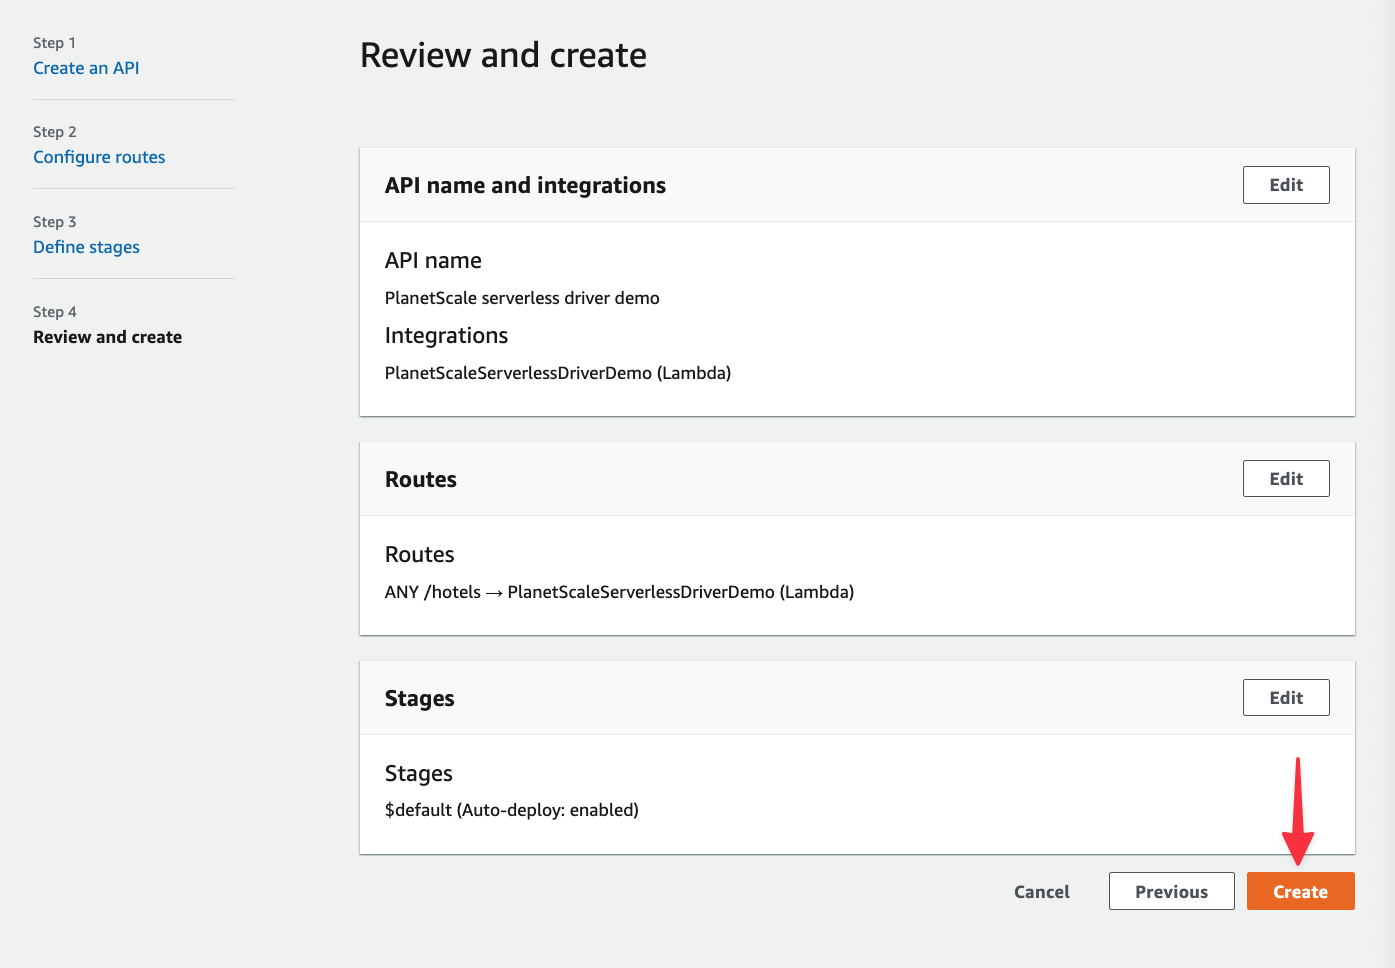
Click on "Create API" to start the process of building a new instance of API Gateway for the Lambda function we created.
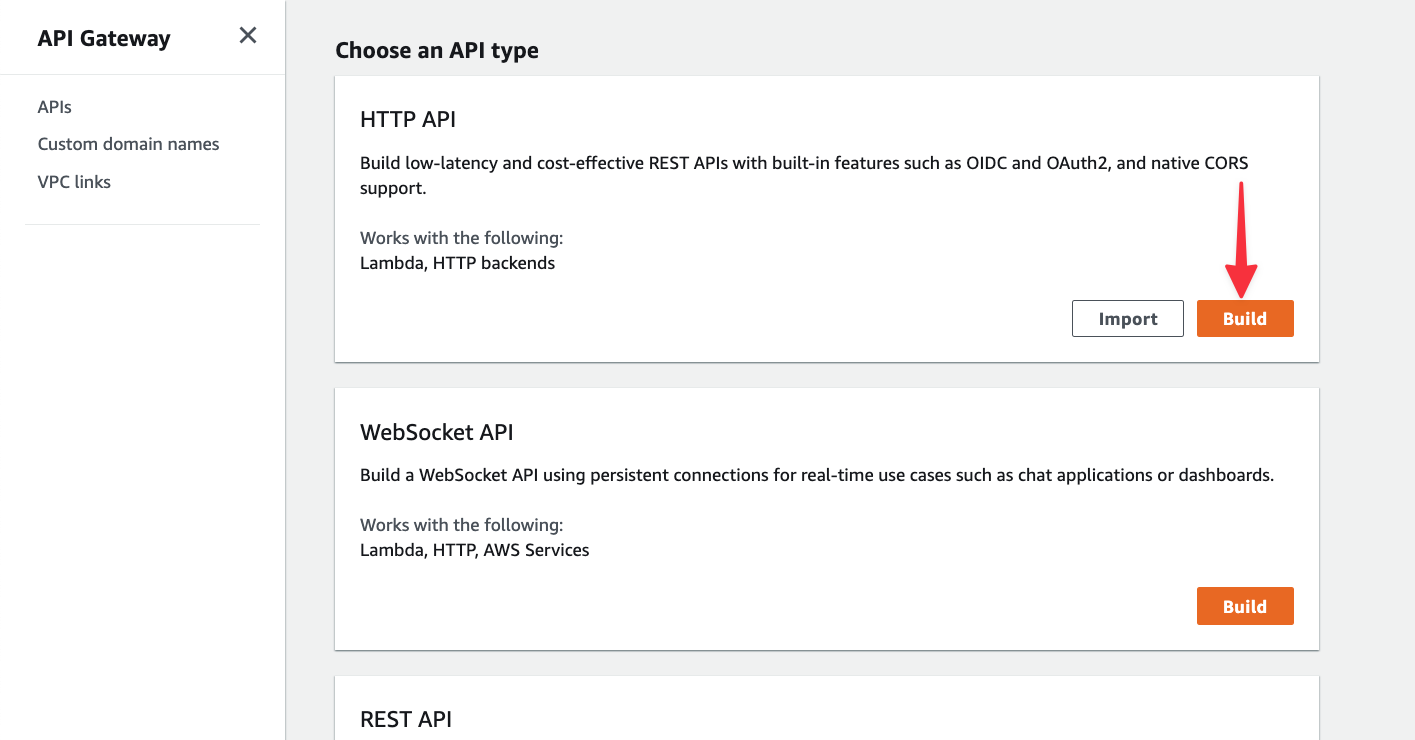
To create an HTTP API, click the "Build" button in that section.
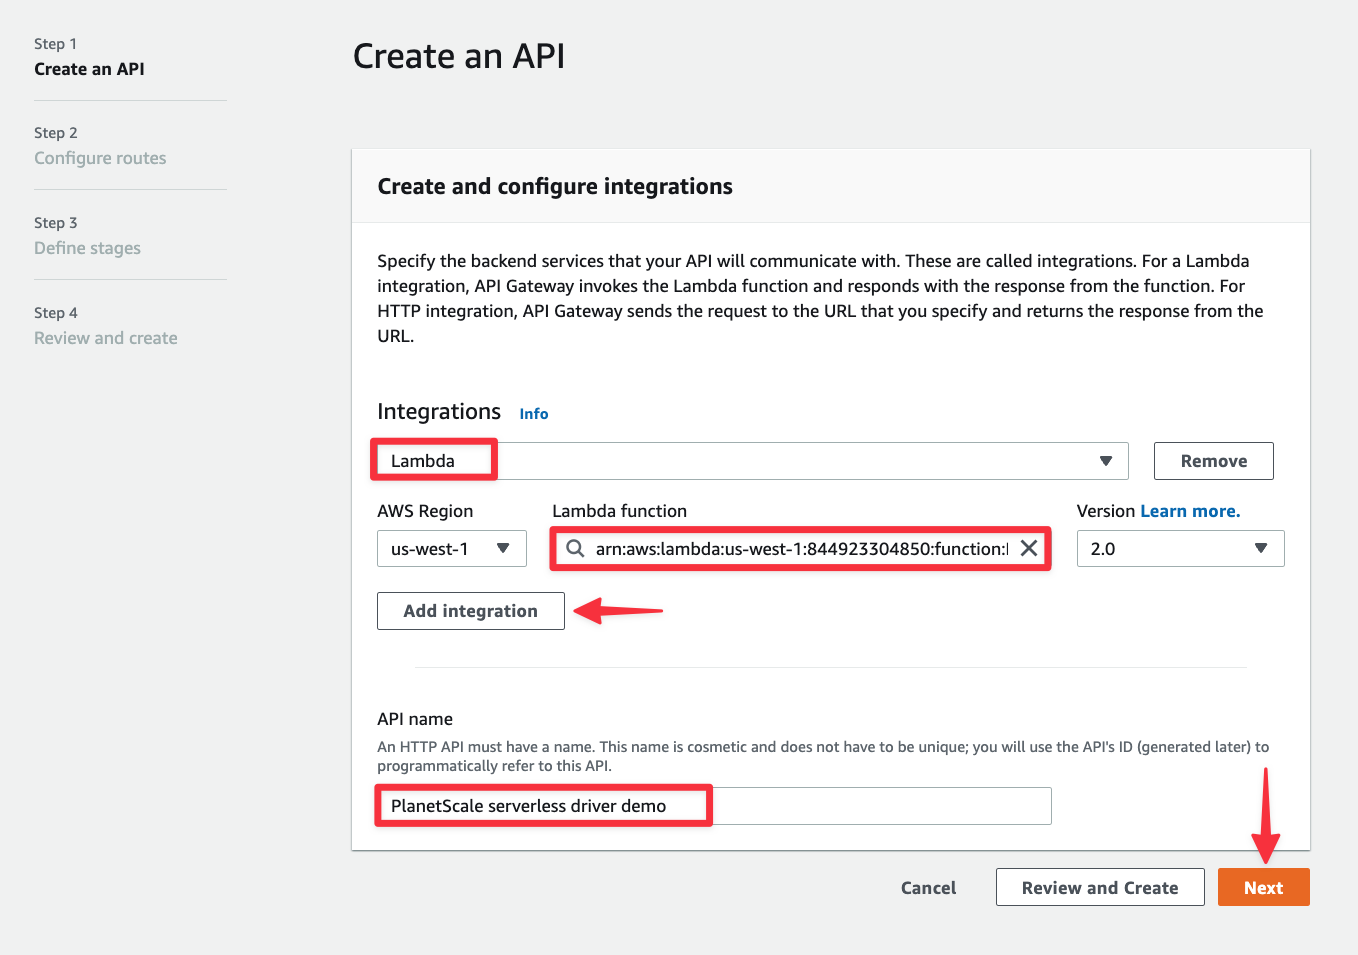
Click on "Add integration". Then select Lambda as the integration type, and select the Lambda you created in the previous section. Give your API a name as well and click "Next".
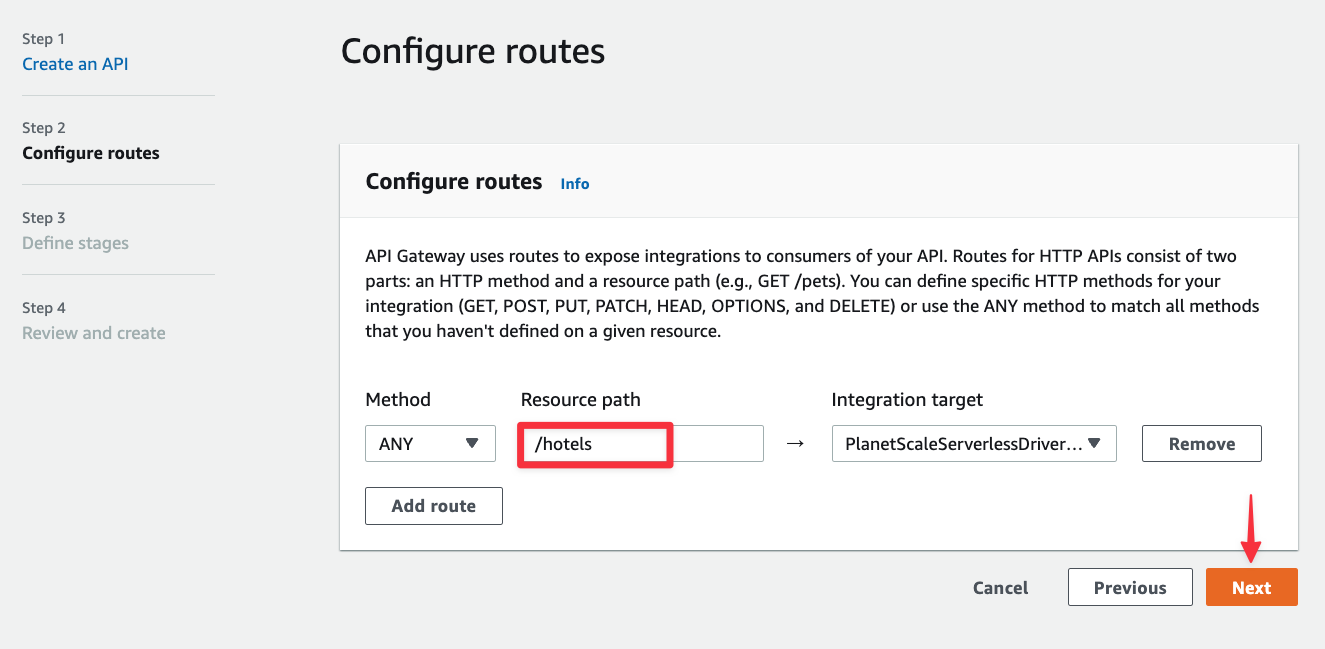
Under Configure routes, change the Resource path to be /hotels and click "Next".
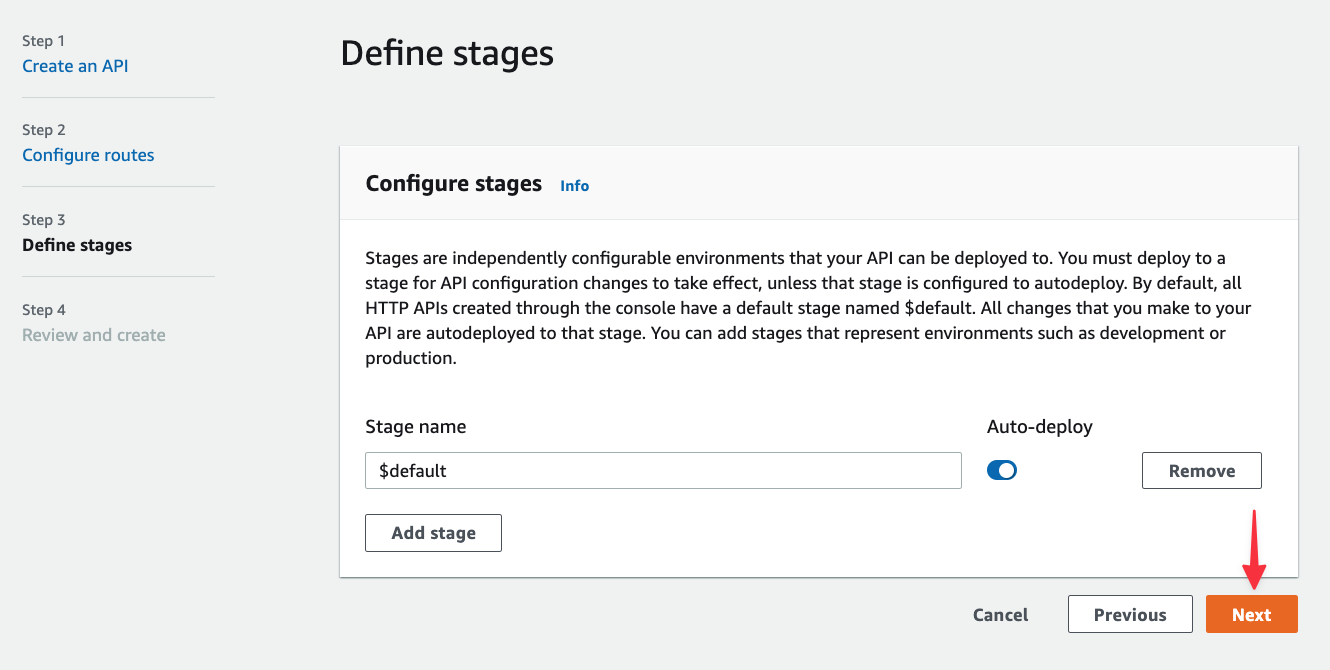
Nothing needs to be changed in the Define stages step, so click "Next".
Finally, click "Create" to complete the process.
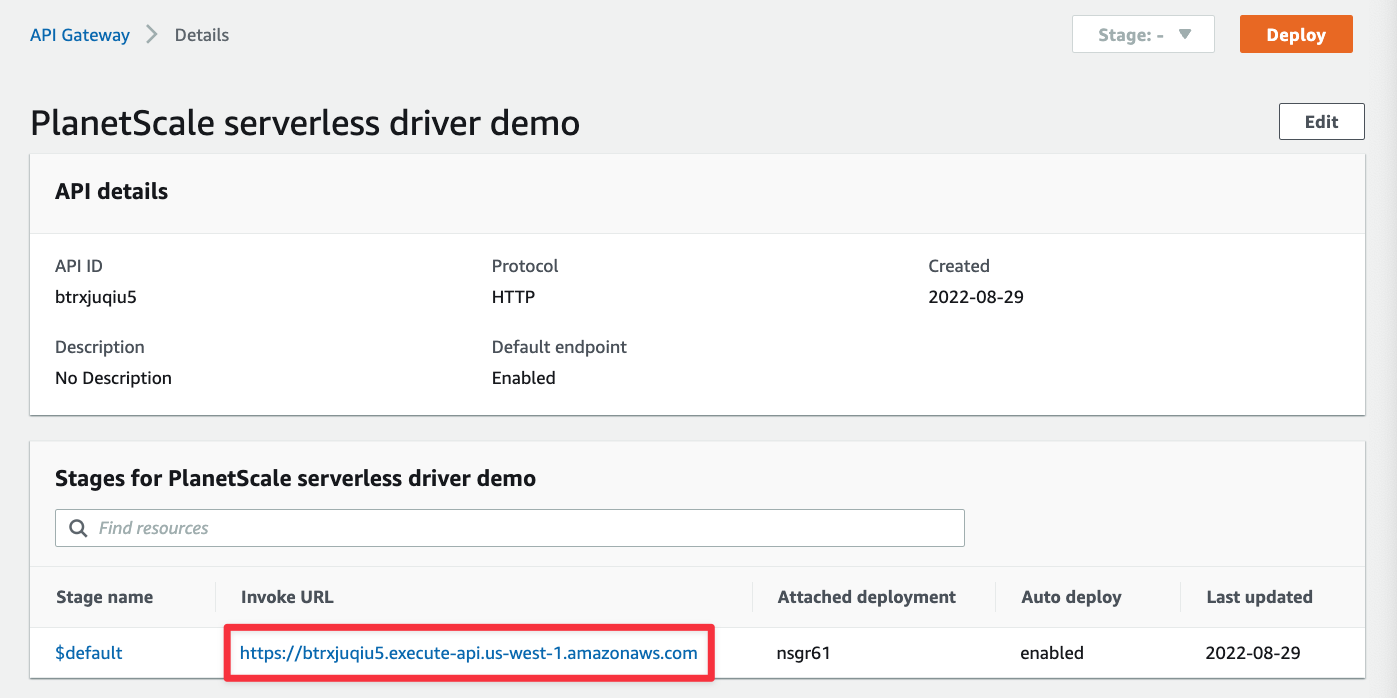
Now grab the Invoke URL from the API you just created, we’ll use this to build some simple tests within VS Code.
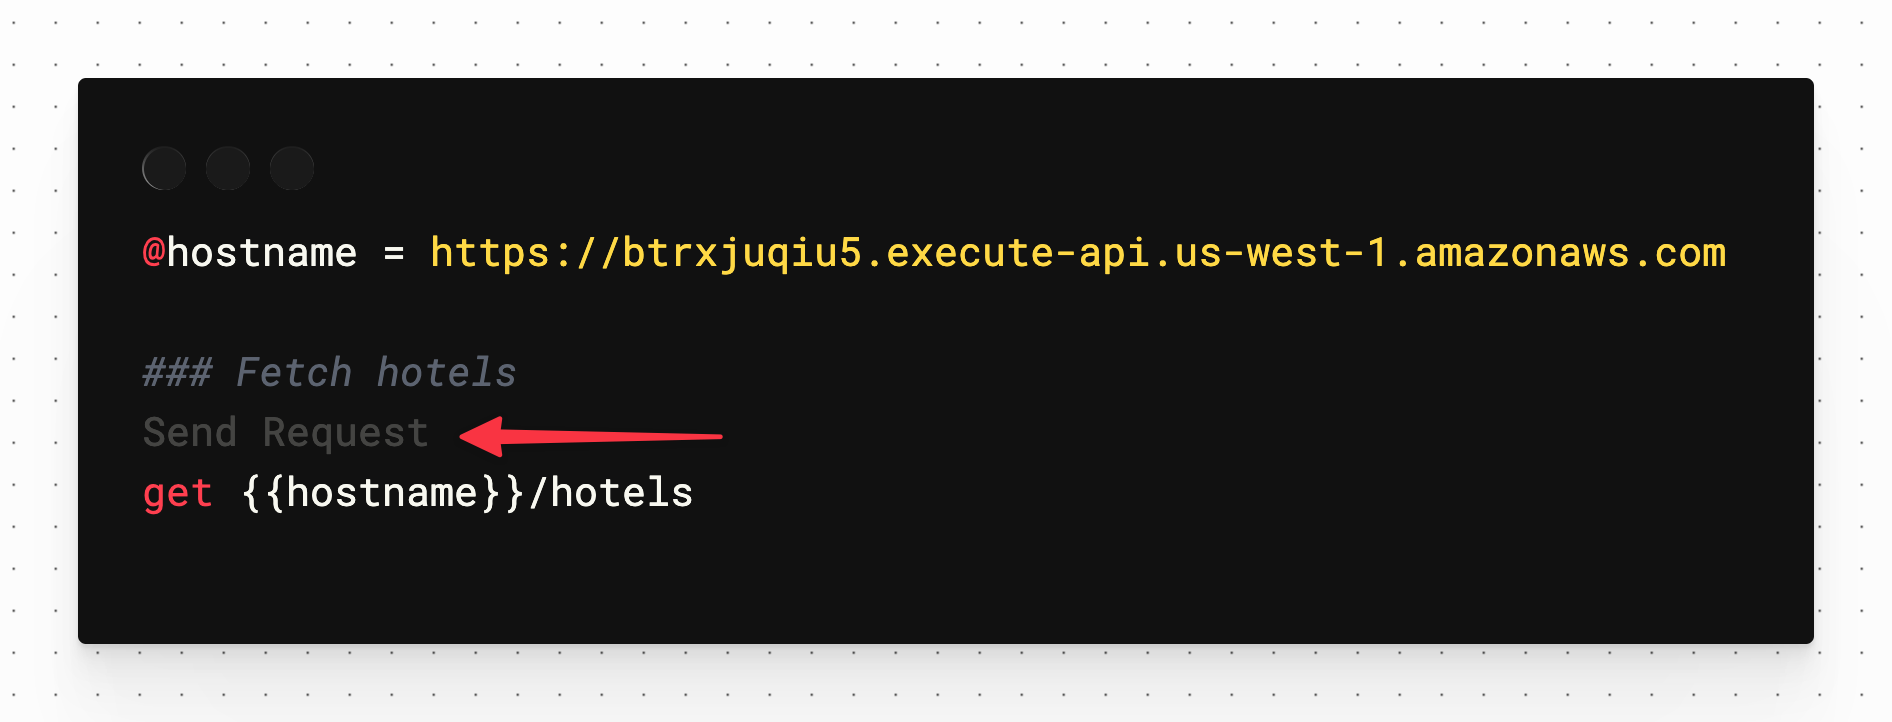
Back in VS Code, create a new file in the root of your directory called tests.http and populate it with the following. Make sure to replace <YOUR_INVOKE_URL> with what you pulled from API Gateway.
@hostname = <YOUR_INVOKE_URL>

### Fetch hotels
get {{hostname}}/hotels

### Create hotel
post {{hostname}}/hotels
Content-Type: application/json
{
  "name": "Orka Sunlife Resort",
  "address": "Güzgülü Mevkii, Ölüdeniz Cd.",
  "stars": 4.2
}
The VS Code Rest Client plugin should recognize this file and display a small link with "Send Request" above each defined request method.
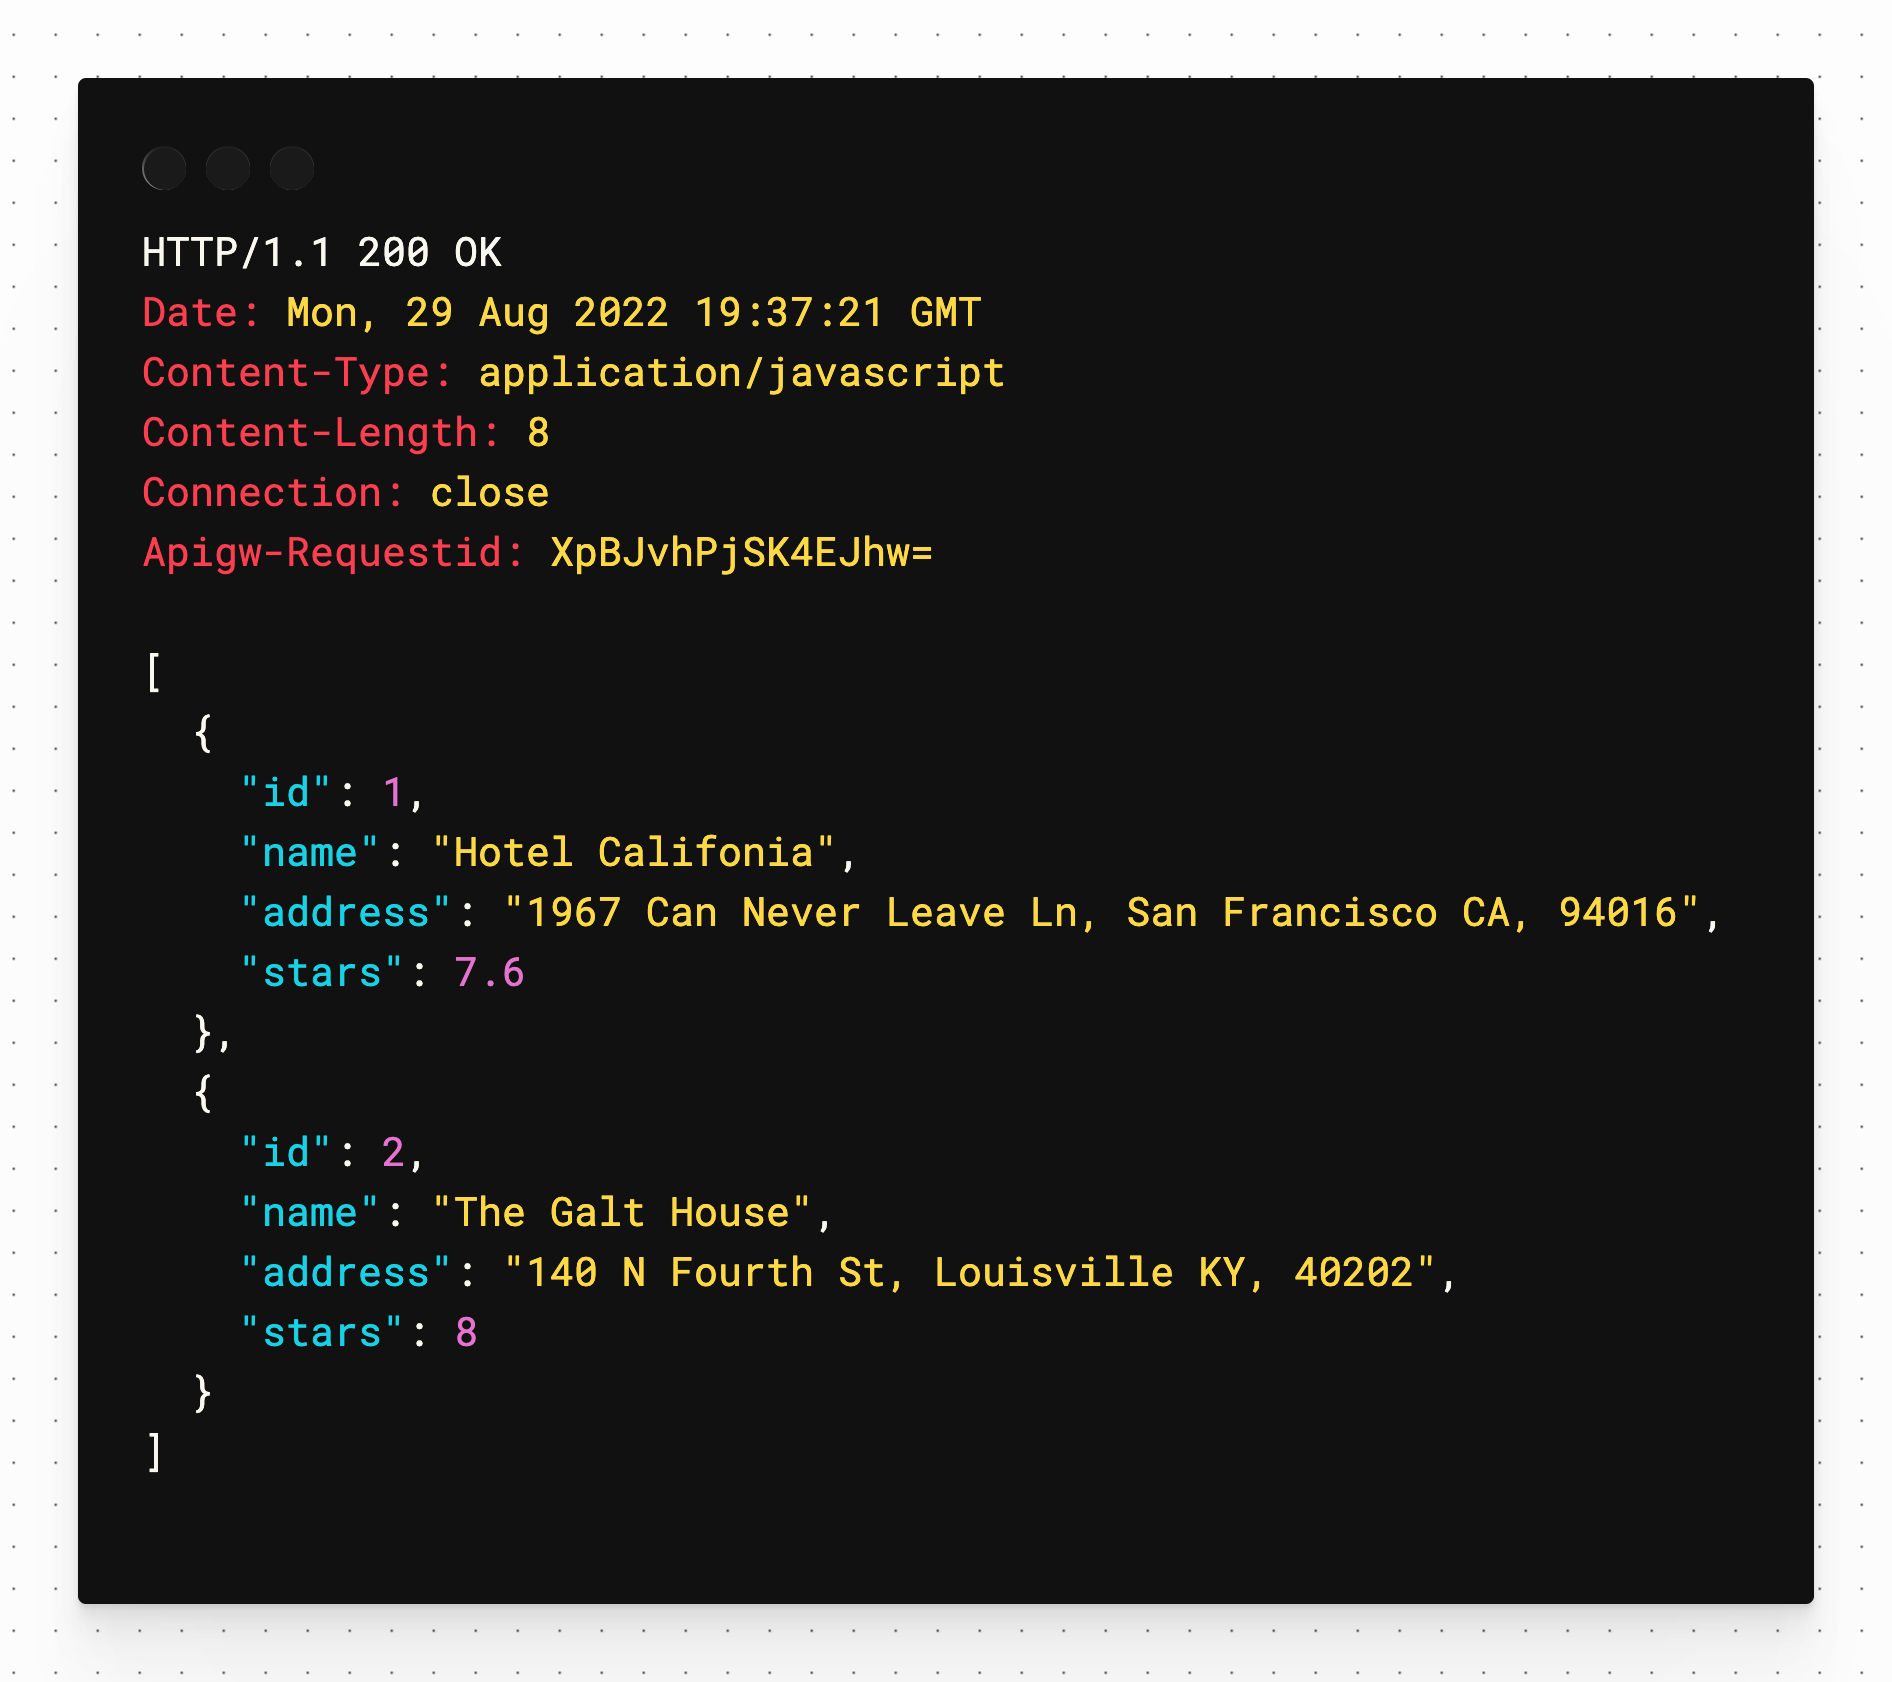
Click the "Send Request" link above the get method and you should receive an array of hotels in a second window pane that will be created automatically.
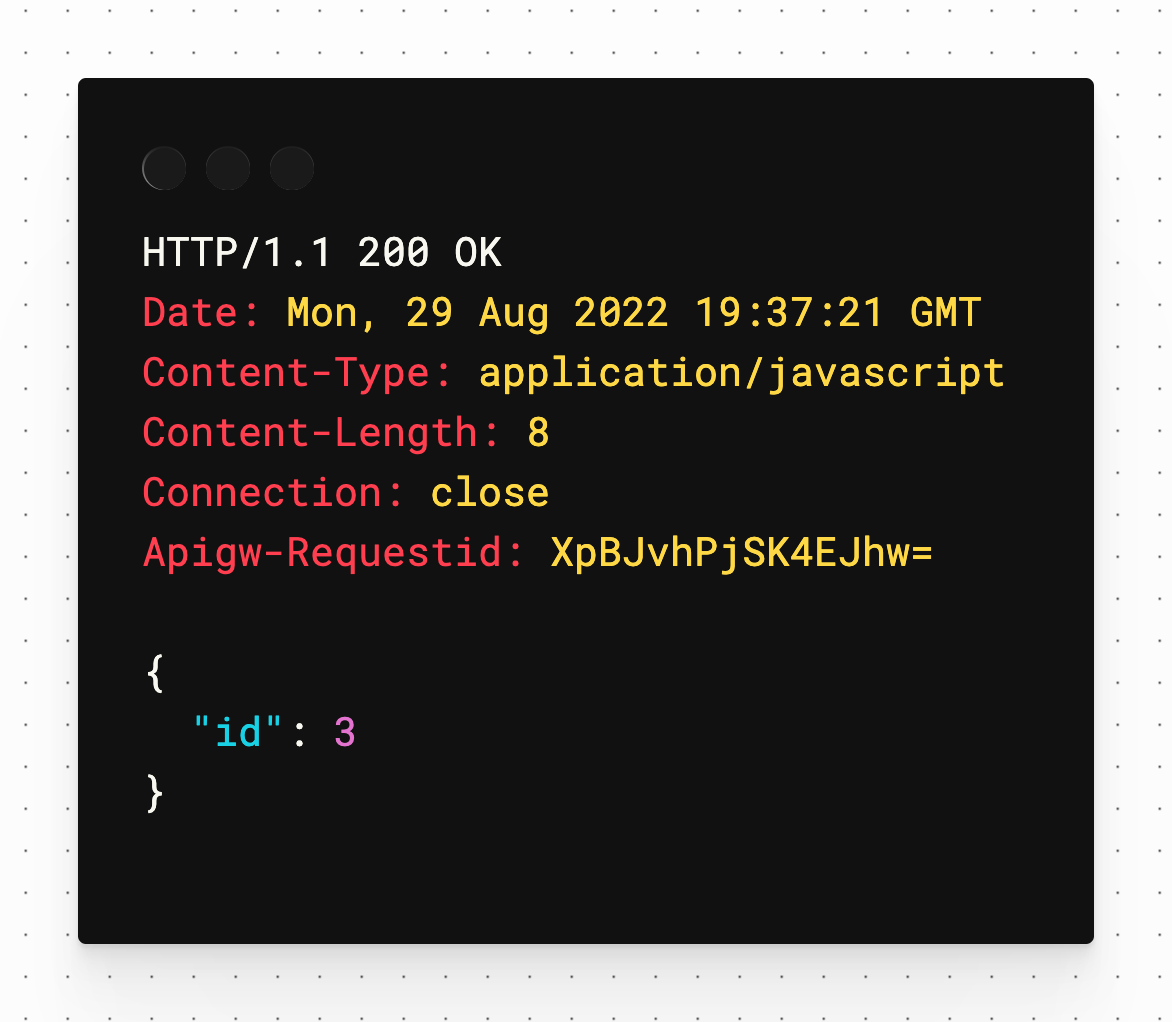
Now test the post method by clicking "Send Request" above that one. You should receive an id field to reflect the ID of the inserted record in PlanetScale.
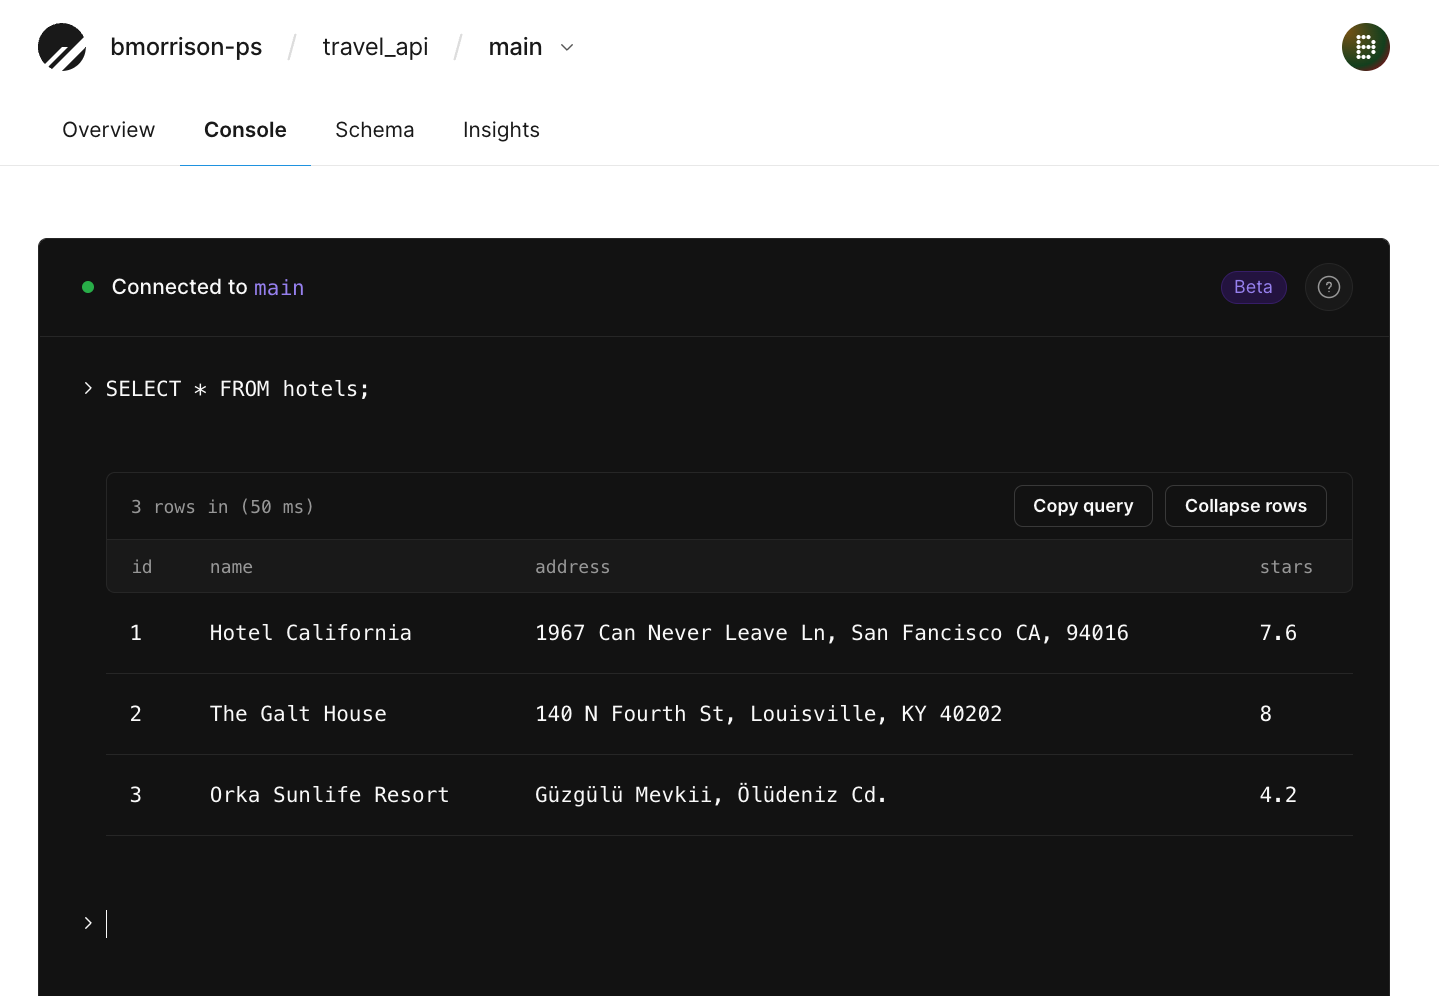
Optionally you can also check the database in PlanetScale using the console to run the following script:
SELECT * FROM hotels;
This should display the newly created hotel along with the original two added earlier.
Now let’s get the put and delete methods working. Update the handler function in the code to reflect the following. Note that the switch statement has been updated to handle those methods.
export async function handler(event) {
  const conn = db.connection()

  switch (event.requestContext.http.method) {
    case 'GET':
      return await get(conn, event)
    case 'POST':
      return await post(conn, event)
    case 'PUT':
      return await put(conn, event)
    case 'DELETE':
      return await del(conn, event)
    default:
      return {
        statusCode: 404
      }
  }
}
At the end of the file, add the put and del JavaScript methods (we have to use del since delete is a keyword in the JavaScript language). Zip and re-upload the code into AWS after this has been done.
async function put(conn, event) {
  const { id } = event.pathParameters
  const { name, address, stars } = JSON.parse(event.body)

  const res = await conn.execute('UPDATE hotels SET name=:name, address=:address, stars=:stars WHERE id=:id', {
    name,
    address,
    stars,
    id
  })

  if (res.error) {
    return {
      statusCode: 500,
      headers: {
        'Content-Type': 'application/javascript'
      },
      body: JSON.stringify(res.error)
    }
  }

  return {
    statusCode: 200
  }
}

async function del(conn, event) {
  const { id } = event.pathParameters

  const res = await conn.execute('DELETE FROM hotels WHERE id=:id', {
    id
  })

  if (res.error) {
    return {
      statusCode: 500,
      headers: {
        'Content-Type': 'application/javascript'
      },
      body: JSON.stringify(res.error)
    }
  }

  return {
    statusCode: 200
  }
}
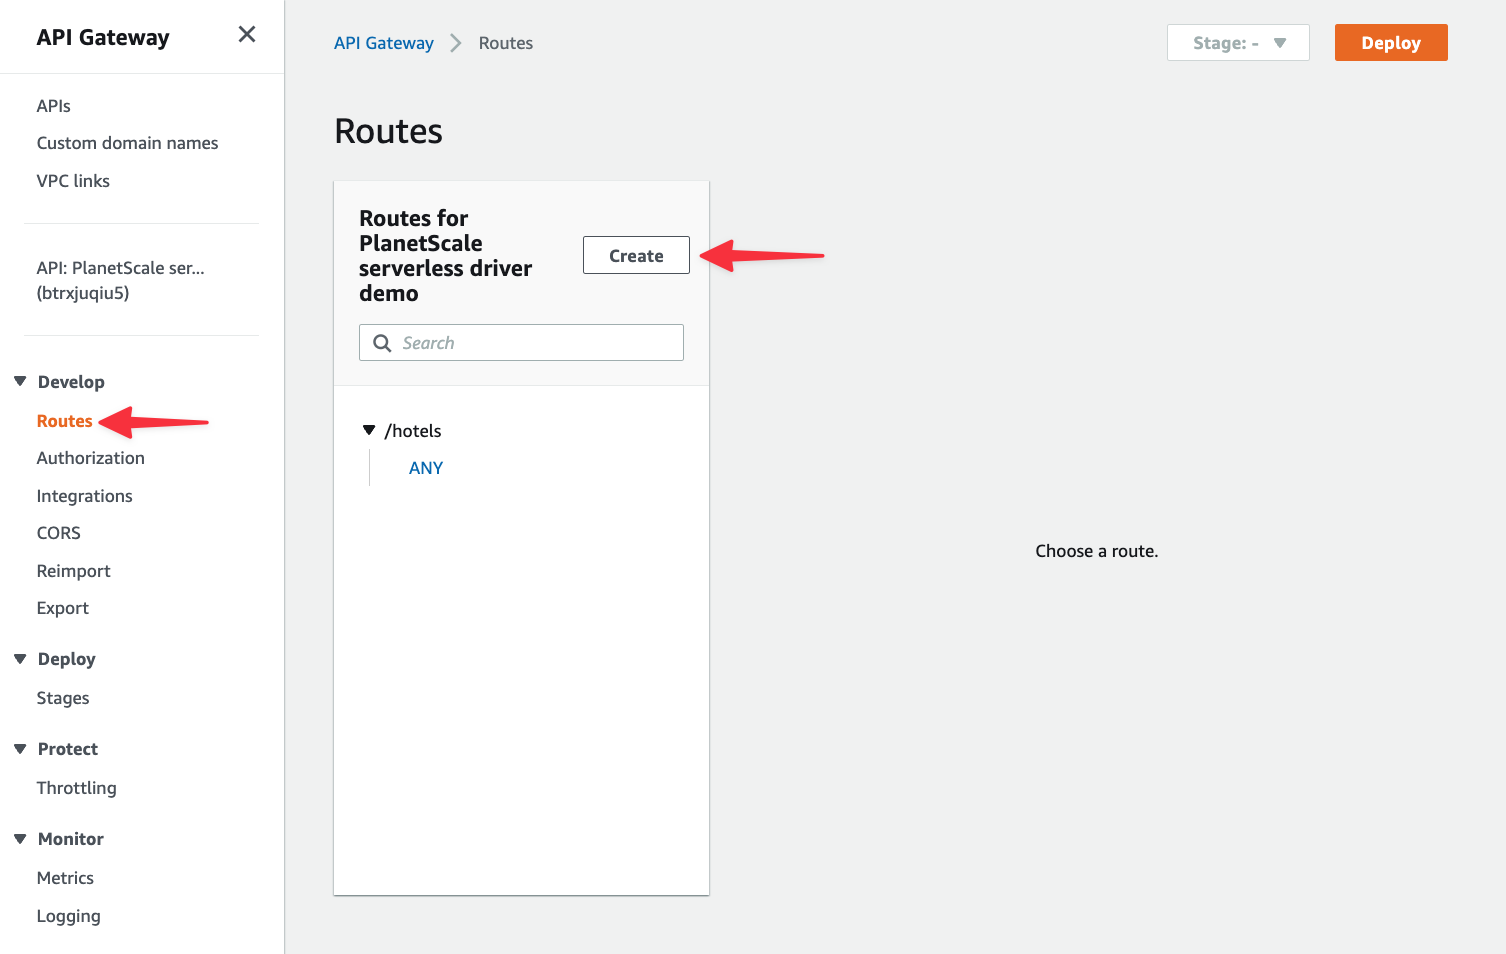
Since typically put and delete methods are used on individual records, they are often accompanied by a record ID in the URL. We need to add an API route in API Gateway to handle the URL pattern /hotels/{id}. Navigate to your API in API Gateway again, select "Routes" from the left nav, and click "Create".
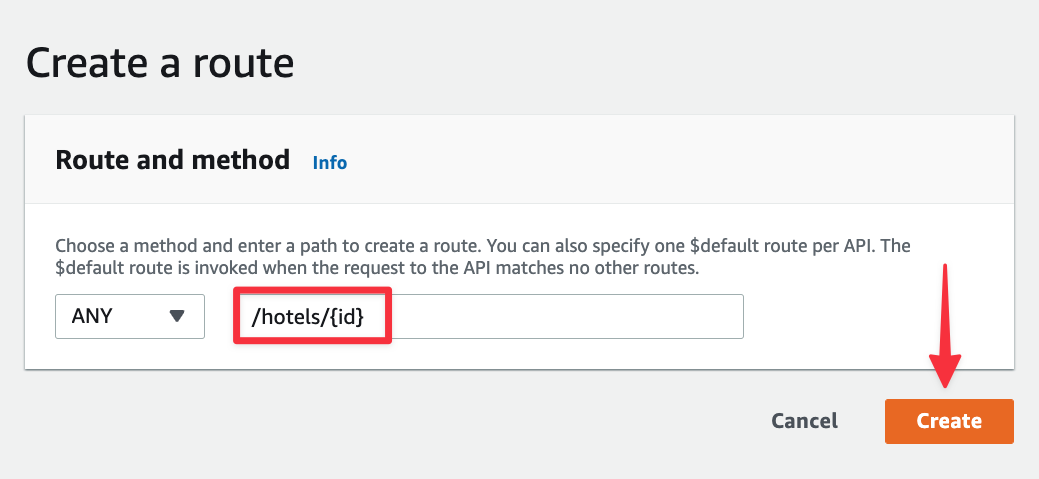
In the route field, add "/hotels/{id}" and click "Create".
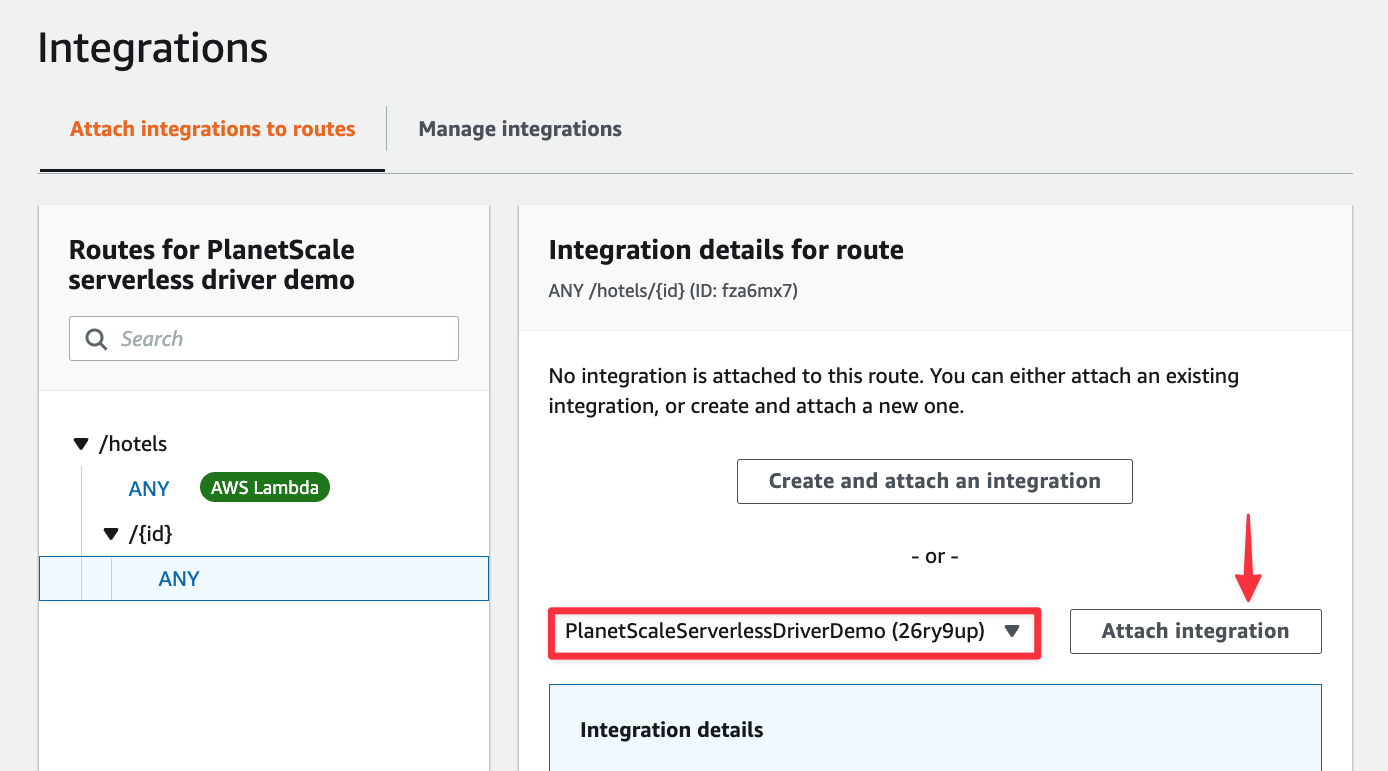
Select the new route from the list and click "Attach integration".
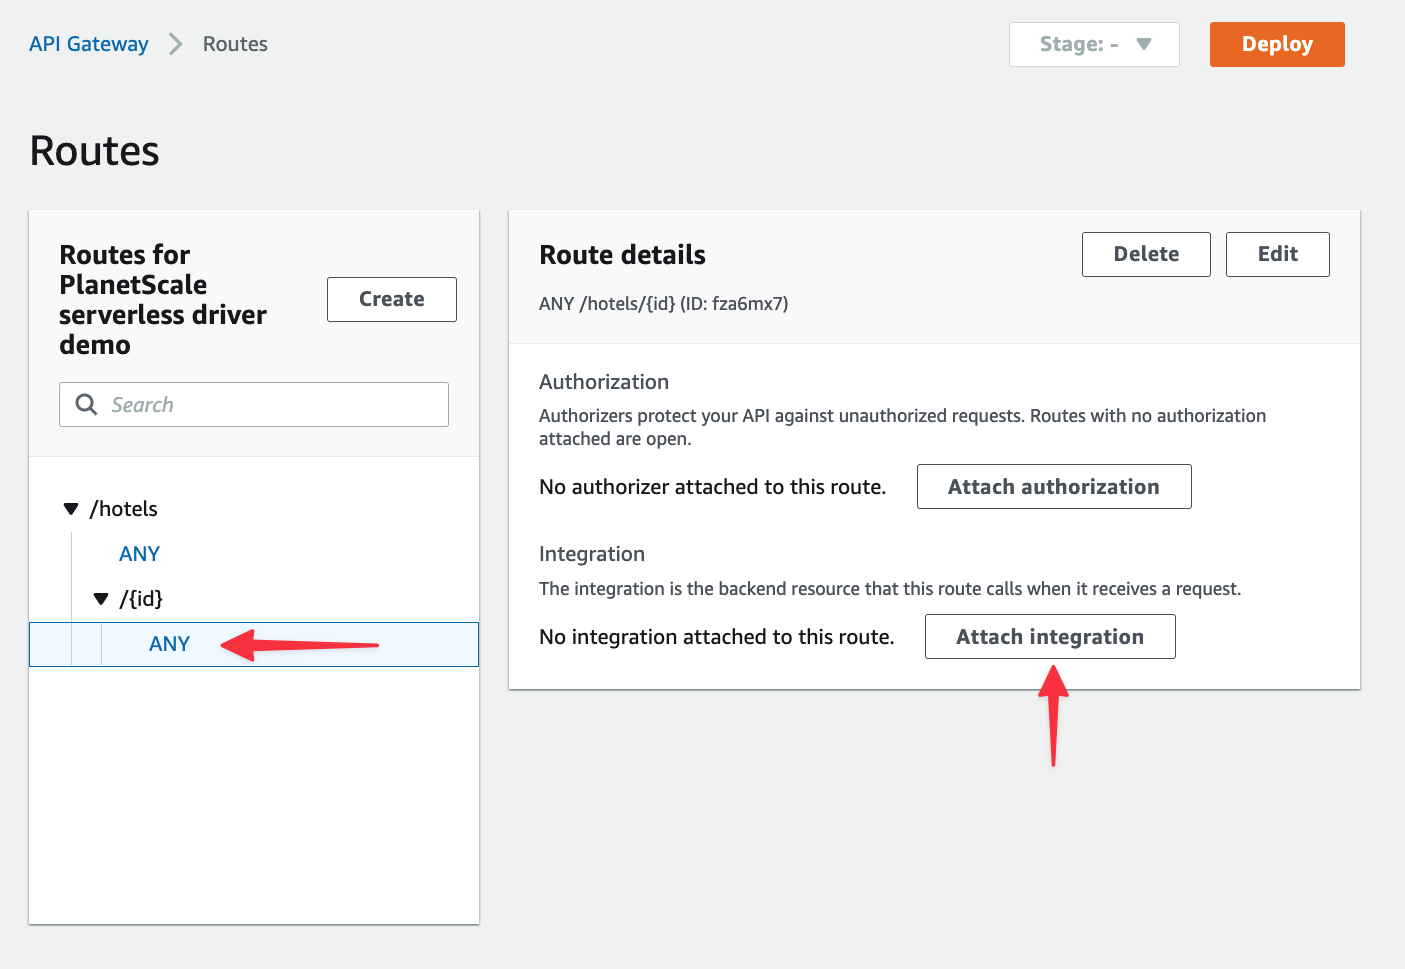
Select your Lambda function from the list and click "Attach integration" again.
Now head back to the tests.http file in VS Code and add the following two requests to the file. Notice the JSON under the put request has each field modified just a bit. An ID of 3 is also at the end of the URL, which is how the Lambda code identifies which record it should update.
### Update hotel
put {{hostname}}/hotels/3
Content-Type: application/json
{
  "name": "Orka Sunlife Resort Aqua",
  "address": "Güzgülü Mevkii, Ölüdeniz Cd. Turkey",
  "stars": 4.3
}
### Delete hotel
delete {{hostname}}/hotels/3
Run the put request and it simply returns an OK status, but if you run the get request again, you’ll see that the third entry in the array reflects the updated values we sent int.
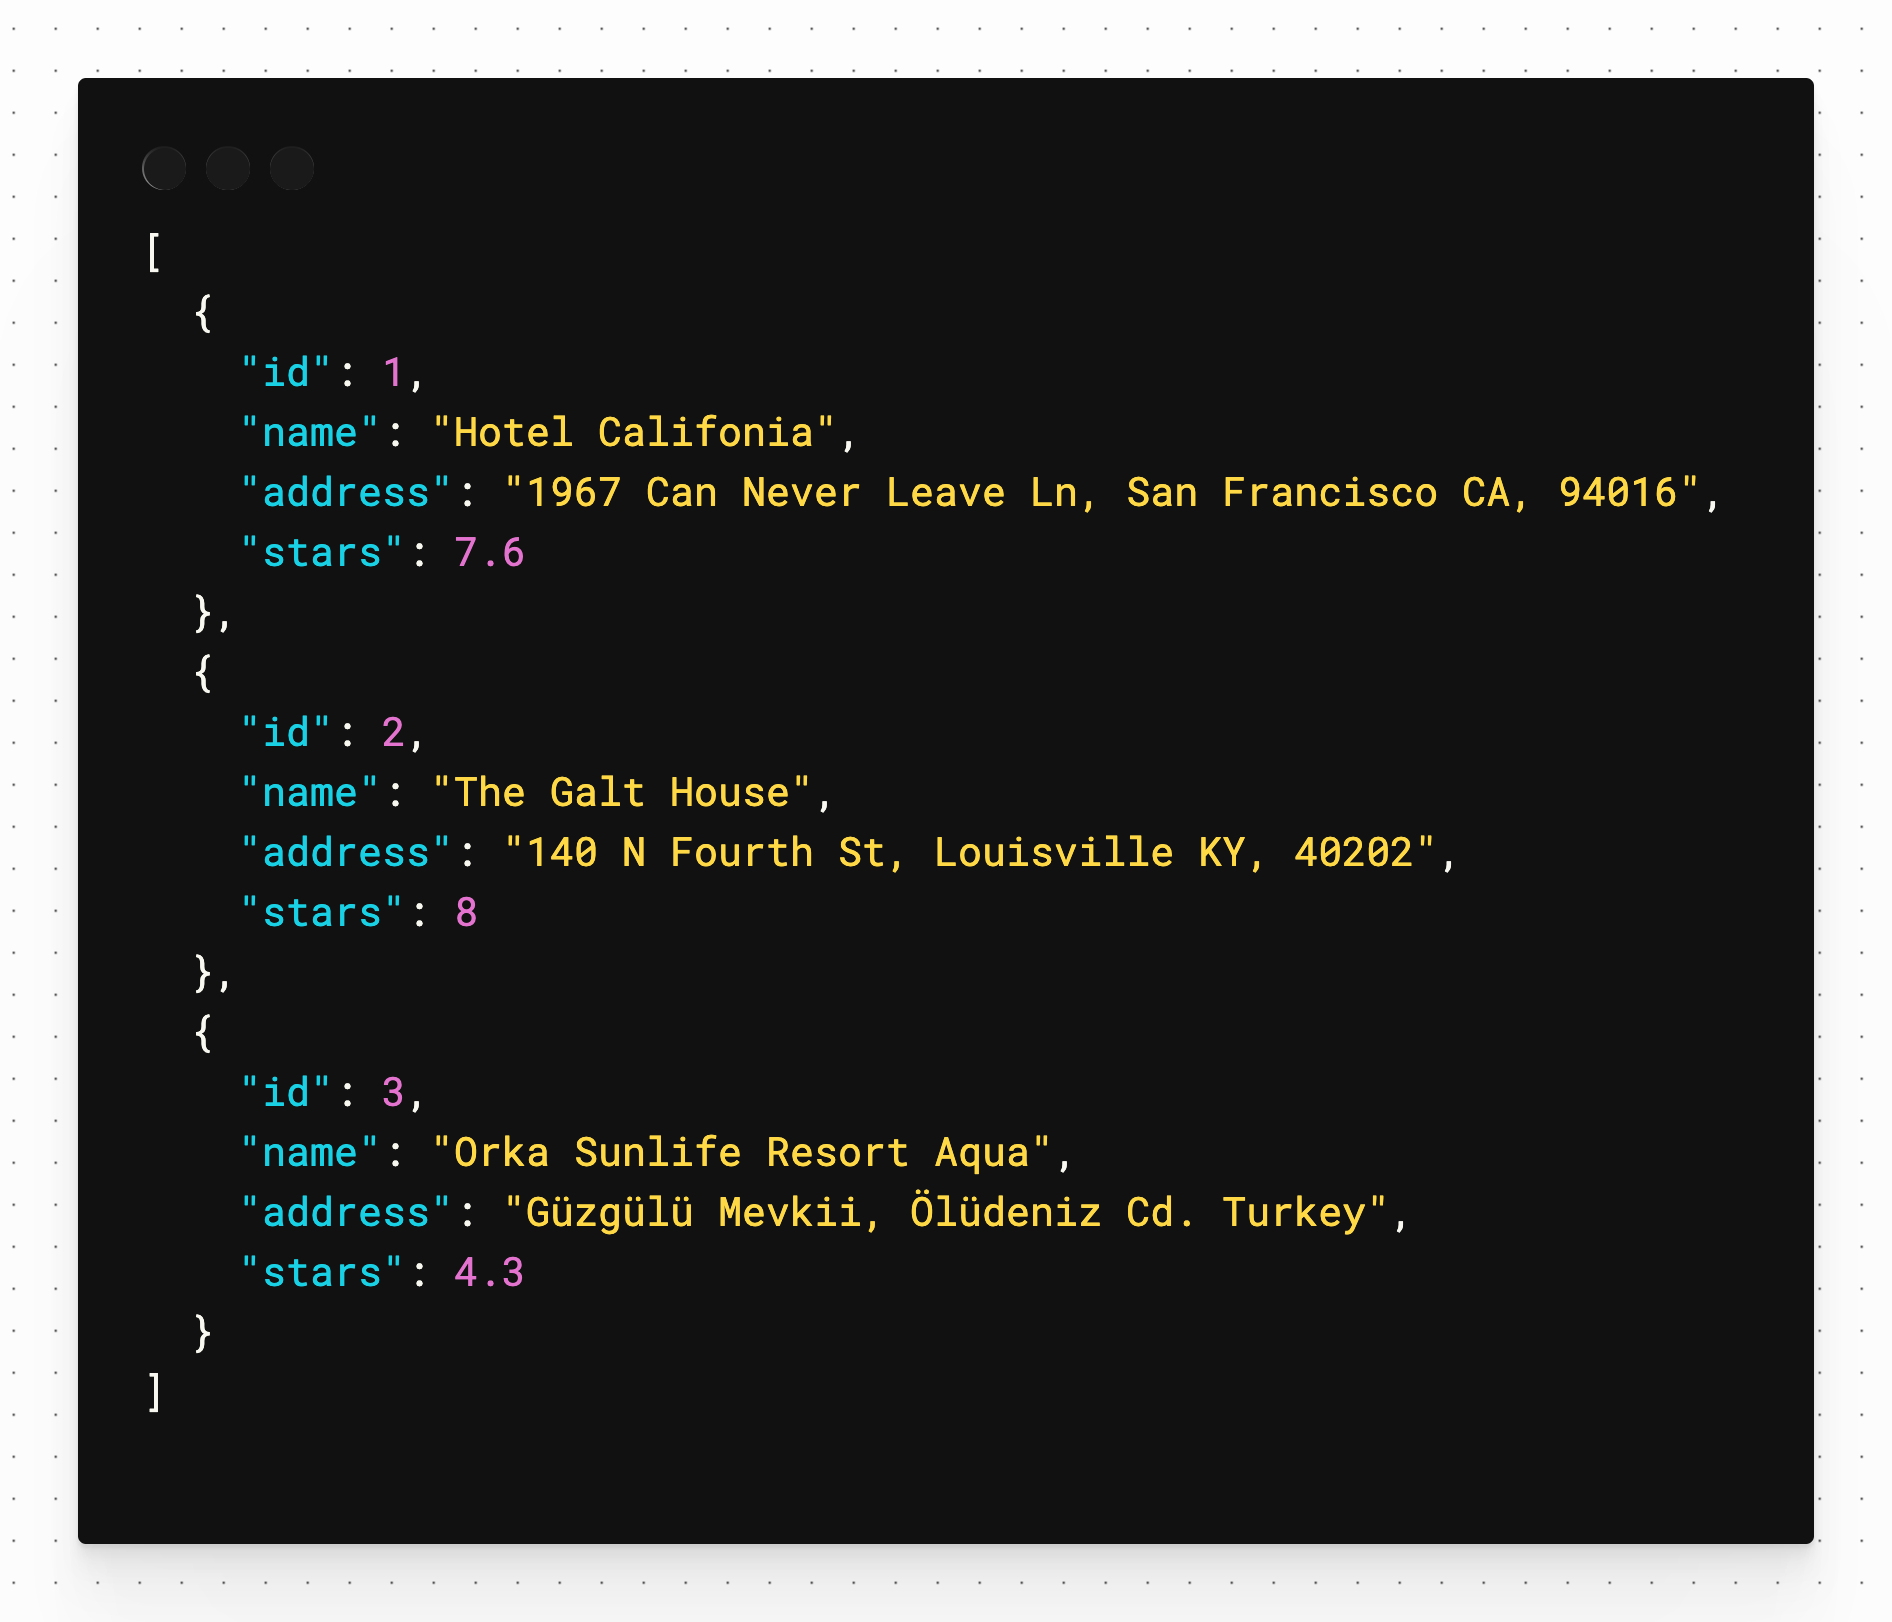
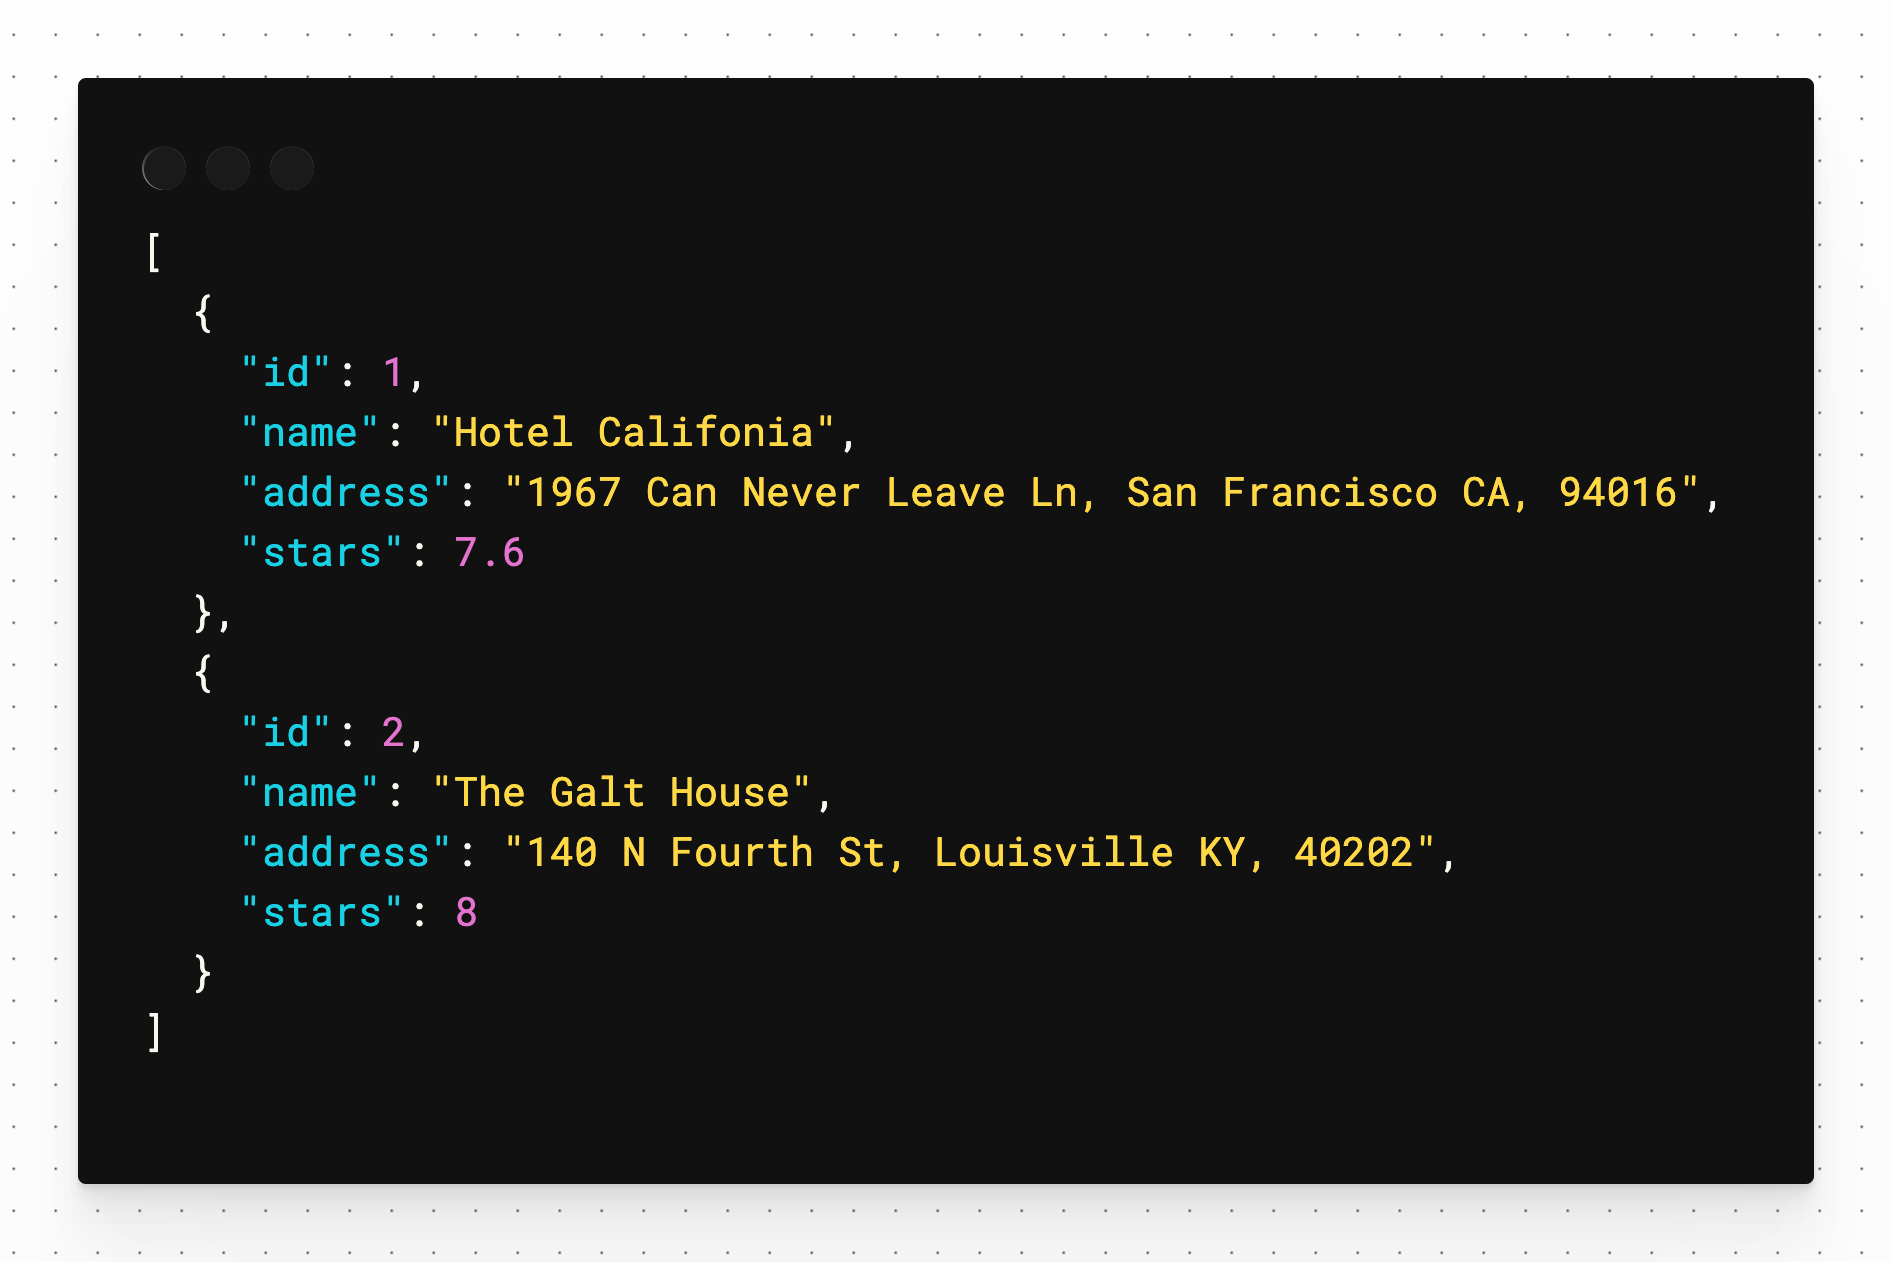
Finally, run the delete request. Again, it returns an OK status. Run the get again and that third record is removed.
For more information on how to use the PlanetScale serverless driver for JavaScript, refer to our documentation portal where we have a detailed overview of when you should use it, as well as an example built with Node and Express that you can run directly on your workstation.