
Declarative MySQL schemas with Atlas CLI
Overview#
One of the best things the DevOps movement has ushered in is the concept of Infrastructure as Code. IaC lets you define your infrastructure in specially formatted files, and allows you to use automation tools to create or modify your infrastructure based on those files. But did you know that you can also manage your database schemas in a similar approach?
Atlas CLI is a command line tool that helps manage the structure of your database by keeping a representation of the schema in a file. It can be used by itself to manage your schema changes, or as part of a CI/CD pipeline to automate the process of updating your schema based on the definition file. In this article, we’ll cover the basics of using Atlas CLI to generate a schema definition file, as well as updating the schema of a PlanetScale database using the tool.
To follow along, you should have the following:
- A PlanetScale account.
- The PlanetScale CLI installed and configured.
- The Atlas CLI installed and configured.
Set up the database#
Start by creating a new database in PlanetScale using the CLI.
pscale database create hotels_db
Now create a password to use to connect to the new database.
pscale password create hotels_db main <YOUR_PASSWORD_NAME>
Note: Giving your password a name lets you identify the credential set in the PlanetScale dashboard.
Take note of the USERNAME, ACCESS HOST URL, and PASSWORD values as you’ll need them in the following section.
Next, you’ll need to enter into a shell session with the database to create a table. Run the following command to enter the shell:
pscale shell hotels_db main
Run the following SQL script to create a table called hotels:
CREATE TABLE hotels(
  id INT UNSIGNED PRIMARY KEY AUTO_INCREMENT,
  name VARCHAR(50) NOT NULL,
  address VARCHAR(50) NOT NULL,
  stars FLOAT(2) UNSIGNED
);
Generate the schema definition file#
Atlas makes it easy to apply a "Database as Code" approach to an existing database by generating a file representing the schema of that database. Before you can do so, you’ll need to craft a connection string so the CLI can properly connect to the PlanetScale database created in the previous section. Use the following format to create your own connection string:
"mysql://<USERNAME>:<PASSWORD>@<ACCESS HOST URL>/hotels_db?tls=true"
Going forward, this article will use <CONNECTION_STRING> as a reference to the connection string above. To generate a schema file based on the database above, run the following command:
atlas schema inspect -u <CONNECTION_STRING> > schema.hcl
You should now have a file named schema.hcl in the working directory. If you inspect it, it should look like the following. Note how the outer table node contains a reference to the hotels_db schema, as well as a definition for each column created in the previous section.
table "hotels" {
  schema = schema.hotels_db
  column "id" {
    null           = false
    type           = int
    unsigned       = true
    auto_increment = true
  }
  column "name" {
    null = false
    type = varchar(50)
  }
  column "address" {
    null = false
    type = varchar(50)
  }
  column "stars" {
    null     = true
    type     = float
    unsigned = true
  }
  primary_key {
    columns = [column.id]
  }
}
schema "hotels_db" {
  charset = "utf8mb4"
  collate = "utf8mb4_0900_ai_ci"
}
Modify the schema#
Modifying the schema simply involves making a change to the schema definition file and applying it with the atlas schema apply command. Let’s add a description column to the hotels table by adding the following snippet between the stars column and the primary_key node:
column "description" {
  null = false
  type = varchar(100)
}
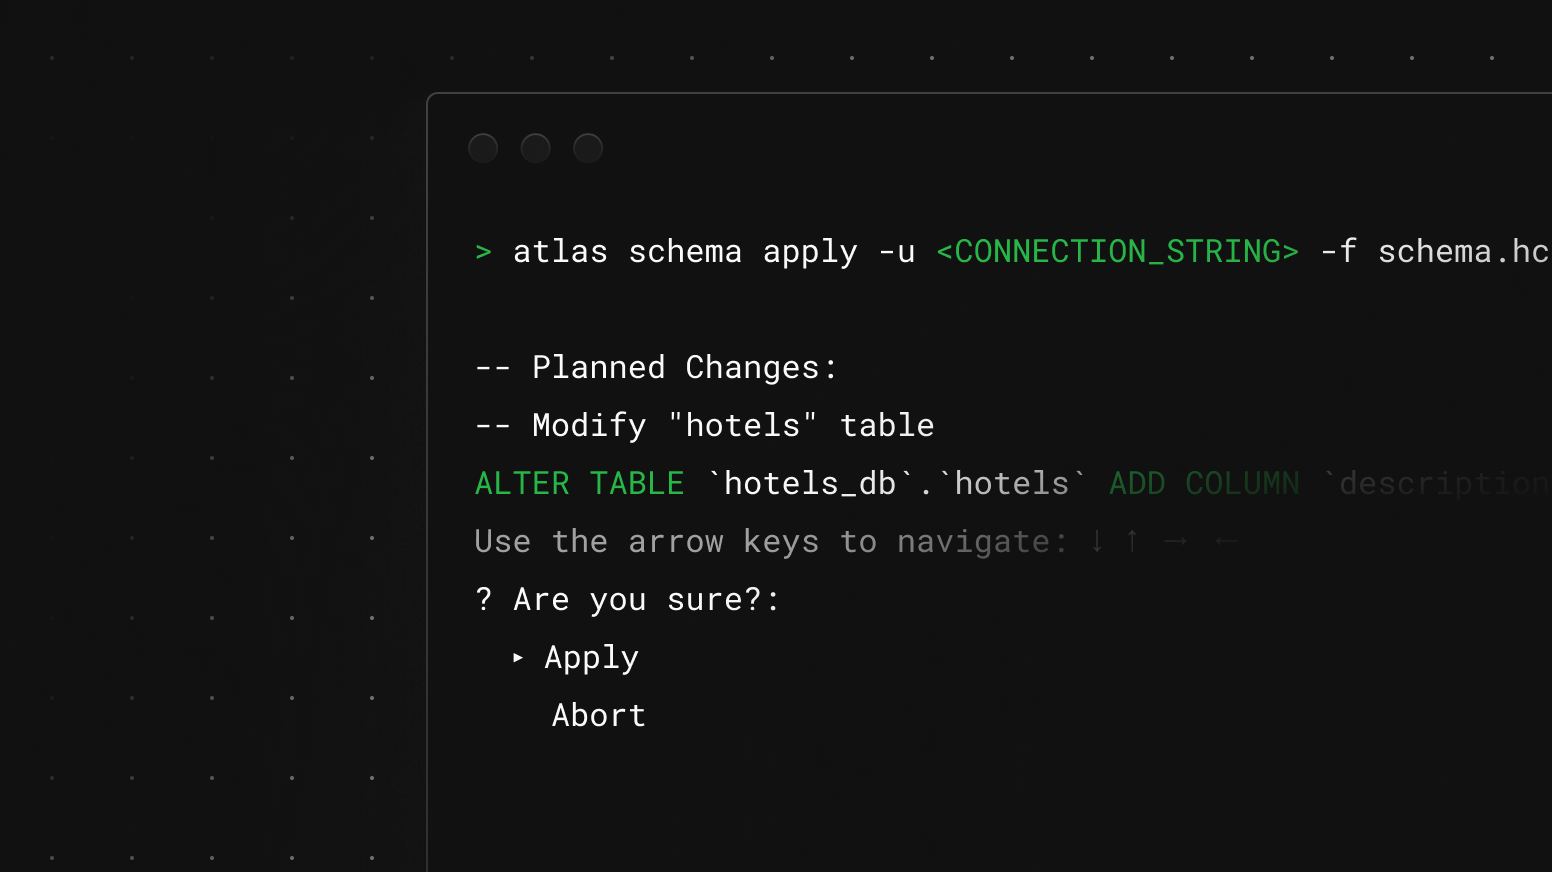
Run the apply command using the connection string and a reference to the schema.hcl file.
atlas schema apply -u <CONNECTION_STRING> -f schema.hcl
Atlas will show you the changes it is about to make to the database upon applying the updated schema. Hit enter on your keyboard to confirm the changes.
-- Planned Changes:
-- Modify "hotels" table
ALTER TABLE `hotels_db`.`hotels` ADD COLUMN `description` varchar(100) NOT NULL
Use the arrow keys to navigate: ↓ ↑ → ←
? Are you sure?:
  ▸ Apply
    Abort
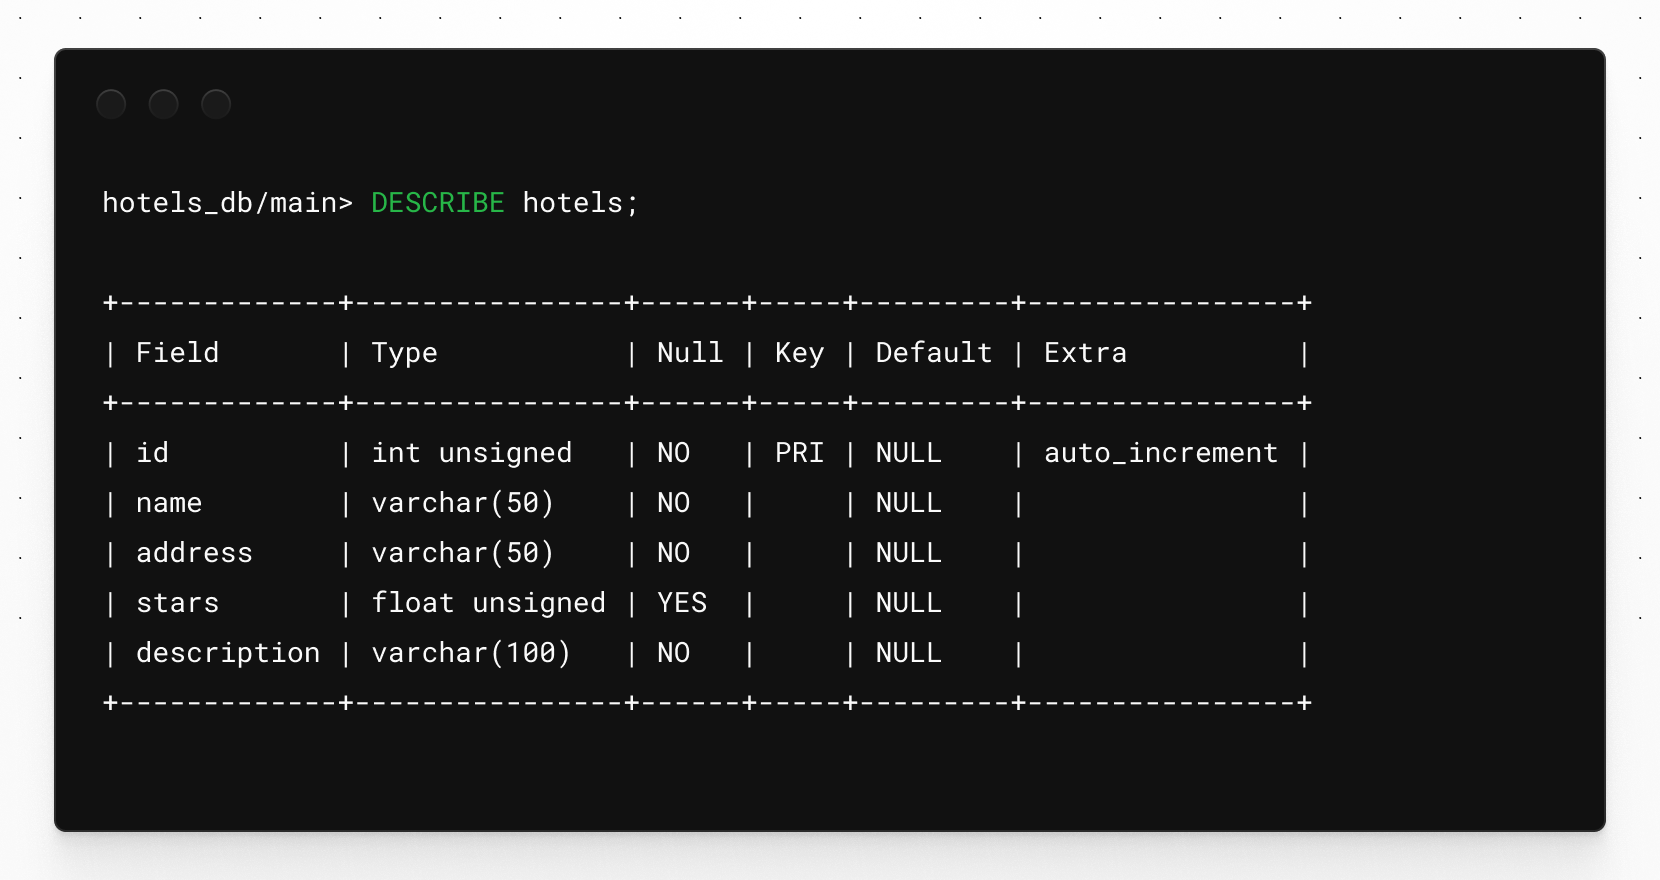
Once changes have been applied, you can inspect the table by using the pscale shell, as described above, and running the following DESCRIBE command:
DESCRIBE hotels;
Notice how the table contains the description column now. That column was added by Atlas when the schema was applied.
Closing remarks#
Atlas can be an incredible utility to add to your DevOps tool kit. It helps you manage your database as code instead of managing your schema manually with SQL commands. Keeping your database schema under version allows it to have accountability (by configuring Atlas to apply changes on git operations) as well as provides a historical reference to see how your database structure changes over time. One thing to note is that when using Atlas with PlanetScale, you’ll need to use it on a non-production branch since DDL is disabled on production branches.