
Feature storytelling with Framer Motion
On March 24th, we shipped a revolutionary new database feature for PlanetScale databases that lets you revert a schema change. The PlanetScale Design Studio team’s feature landing page needed an interesting illustration to show how the new feature works.
The initial idea was to have a couple of side-by-side tables to illustrate this in action, leveraging the “time machine”-style macOS layering animation for versions. We felt this approach didn’t illustrate the value of what the schema revert feature actually provides. Our idea evolved to a storytelling concept: What might happen in someone’s day if they were put in a situation of needing to revert a schema change?
Knowing there was a detailed video walkthrough of the feature further down the page, we created an outline to quickly demonstrate the feature at a high-level.
- Schema change deployed successfully.
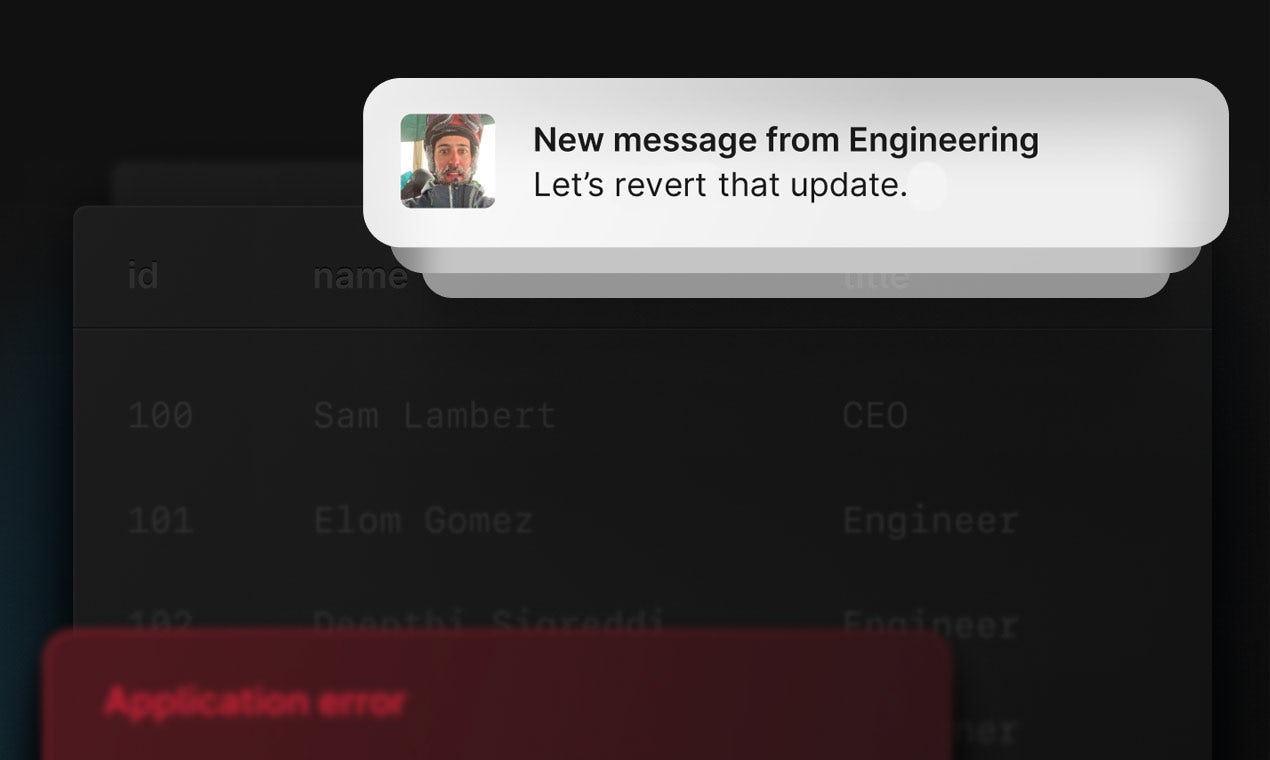
- Schema change that was deployed involved removing a column in a table.
- Theoretically, there were still database queries utilizing that dropped column, so errors appear to represent that issue.
- Team members notice the issue from the deploy and offer support to resolve.
- Schema revert UI surfaces as the solution for the issue. It gets clicked.
- As instant as the PlanetScale schema revert feature is, we visually restore the table that once was and note that all other data changes that have happened since the bad deploy was retained in the revert.
- Someone acknowledges the easy success of utilizing the feature.
The next obvious question was, "Okay, this seems cool, but how long is this going to take to build?". The answer was easy, "I have no idea."
From there, we were off to Figma to put some pixels in place so that we could gauge the level of detail we were after. By the end, we had 12 frames of the various states we wanted to show.

Time to test the animation concept in code. There are certain tools you use that feel like magic — one is Framer Motion’s React animation library. To figure out the time and effort necessary to polish our concept, we started with some basic SVG rectangles colored-coded to represent the various components we’d need in the final animation. With these, we could position, animate, time, sequence, and compose the entire animation in Motion with just basic shapes on the screen… while developing not only an idea of how long the animation would be, but also gaining better understanding on how much design engineering would be needed to fully build it out.

In a matter of just a few hours, it was clear how much velocity we were achieving by using Framer Motion. Motion’s useAnimation hook, Motion’s start method, and a simple async function let us sequentially trigger animations. We were able to adjust timing of individual story beats while composing the full animation.
Motion has a delay prop to use on animation objects to set a delay for individual parts to start animating. Sometimes, we wanted multiple animations to start at the same time, with the same delay before them. Instead of adding the same delay to all our animations in a promise array, we added a simple delay function to call in the sequence right before those grouped animations. This way the delay timing was managed on one object, rather than duplicated on all the objects in the promise array.
A basic example of how the animation sequencing works:
const originalTable = useAnimation()
const newTable = useAnimation()
const successToast = useAnimation()
const errorToast = useAnimation()
const message = useAnimation()

/// Delay function creating a promise to place anywhere in the sequence to pause at its current state for a defined amount of time.
function delay(timeout) {
  const timeoutInSeconds = timeout * 1000
  return new Promise((resolve) => setTimeout(resolve, timeoutInSeconds))
}

async function animationSequence() {
  // Scale and fade in the first table
  await originalTable.start({ scale: 1, y: 0, opacity: 1 })

  // Show this initial table to the viewer for 1 second and then layer in the second table with a scale/fade as well while scaling back the initial table
  await delay(1)
  await Promise.all([
    originalTable.start({ scale: 0.9, y: -40, opacity: 0.25, transition: { ease: 'easeOut' } }),
    newTable.start({ scale: 1, y: 0, opacity: 1, transition: { ease: 'easeOut' } })
  ])

  // Show the success toast after a 1 second delay, and then remove it from view again after 2 seconds.
  await successToast.start({ opacity: 1, y: 0, transition: { delay: 1 } })
  await successToast.start({ opacity: 0, y: 16, transition: { ease: 'easeOut', delay: 2 } })

  // After 1 second show an error toast
  await errorToast.start({ opacity: 1, y: 0, transition: { delay: 1 } })

  // After 1 second of showing the error toast, present a message UI
  await message.start({ opacity: 1, x: 0, transition: { delay: 1 } })
  return
}
By default, if you don’t define a transition duration on the transition configuration object of an individual object, the animation/transition duration is 300ms for each element. The magic of Motion element transition durations is that Motion handles the calculation of when a transition is “finished” automatically for you. In our async function example above, we can guarantee that a promise won’t resolve until its initial delay (if one exists) and transition duration is completed. Relying on this ensures you step through the animation without overlap (unless you want to use a promise array to intentionally overlap certain transitions.) Not having to calculate these timings like you would in a CSS animation makes the sequence so much easier to compose.
The markup for these elements involves initial styling of opacity: 0 and some x/y position. When we animate them into view, we’re animating them to opacity: 1 and their expected position in the box-model layout of x: 0, y: 0, making sure not to animate them to an arbitrary value and then back. Let the box model work for you rather than trying to fight it. The elements are all in a position: relative wrapping container and position: absolute on themselves to place them exactly where we want them to be in the composition when it’s time to present each one. The only exceptions are the stacking table elements that are in a display: grid container with the grid-area: 1/1 trick to stack them over the same center point. Motion does have an AnimatePresence object you can use for animating in and out of the DOM with React state, but in this case, hiding and showing the DOM elements with opacity was sufficient. In future projects, we’ll explore animatePresence more.
Exporting SVG elements from Figma would be the quickest way to get the visual bits and pieces to the composition, but that comes with trade-offs. The speed of content styling and positioning using Tailwind CSS meant it made more sense to create the visual pieces as individual HTML elements. Using HTML elements over SVGs enabled easier access to portions of the elements for animating and made it simpler to put together responsive versions, avoiding just proportionally scaling down the entire animation.
The final implementation of our animation involves a much larger sequence, but you can see how the above example would scale and evolve into a much more complex composition. Additions and iterations are a matter of adding, editing, and removing from the animation sequence function thanks to Framer Motion handling the timing calculations for us per animation step.

Once we reached our final sequence, the next steps were to review the timing and dial that in. We watched repetitions of the animation, noting where things felt too fast or too slow and adjusted timings based on our manual review.
Putting together these high-level storytelling feature animations allows viewers to get a quick visual representation of a feature and form a mental modal of what to expect when they use it on their own. We’ve received great feedback on providing these types of assets, and it’s something you’ll start seeing more from PlanetScale.